Abelian Desktop Wallet Pro (MLP) Manual
Introduction
This document aims to provide professionals and advanced users with comprehensive steps to successfully install and configure the Abelian Desktop Wallet Pro (MLP) - Your Gateway to Enhanced Privacy and Customization!
Elevate your crypto experience with the brand-new Desktop Wallet Pro (MLP) v1.0.0, a desktop wallet designed to cater to your multi-layer privacy requirements. MLP stands for Multi-Layer Privacy.
What's New?
• Support for multi-layer privacy:
a. Fully-Private Address: Your transactions are encrypted and untraceable, and balances in your wallets remain hidden, ensuring maximum security and anonymity.
b. Pseudonymous Address: The privacy level is comparable to that of Bitcoin, namely, publicly visible coin values and traceable transactions, while benefiting from much lower gas fees and much increased throughput.
• Support for multiple recipients:
a. Fully-Private Recipient: Allows up to 5 recipients, ensuring secure and private transactions.
b. Pseudo-Private Recipient: Allows up to 100 recipients with a maximum of 50 unique recipients, providing flexibility for larger transactions.
• Significant improvement in both speed and storage: the old, original Desktop Wallet Legacy requires users to spend hundreds of hours and even days to sync up the entire Abelian block-chain when running the desktop application for the first time. It also takes over 100GB of storage space. This brand new Desktop Wallet Pro (MLP) v1.0.0 takes only 45 minutes or less (depending on your network speed and bandwidth) to complete the one-time synchronization and less than 100MB of storage.
• Introduced the concept Memo, which allows users to write messages onto the post-quantum and immutable Abelian ledger. For the first time on Abelian, we can now write our personal notes onto the ledger permanently.
Why Should You Upgrade?
• Existing users of Desktop Wallet Legacy are strongly recommended to migrate now to this brand new Desktop Wallet Pro (MLP) so that they no longer need to remember the maximum recoverable number of wallets. To migrate, we need to create a new wallet at the Desktop Wallet Pro (MLP) and then use the Desktop Wallet Legacy to transfer all the ABEL coins to the new wallet.
• For the first time, you can create wallets, some of them are fully-private and some others are pseudo-private.
Upgrade to the Desktop Wallet Pro (MLP) v1.0.0 today and create a new wallet now.
Steps to Operate
Download and Installation
Navigate to the Abelian Official Website Download Page to acquire the installation package for Abelian Desktop Wallet Pro (MLP).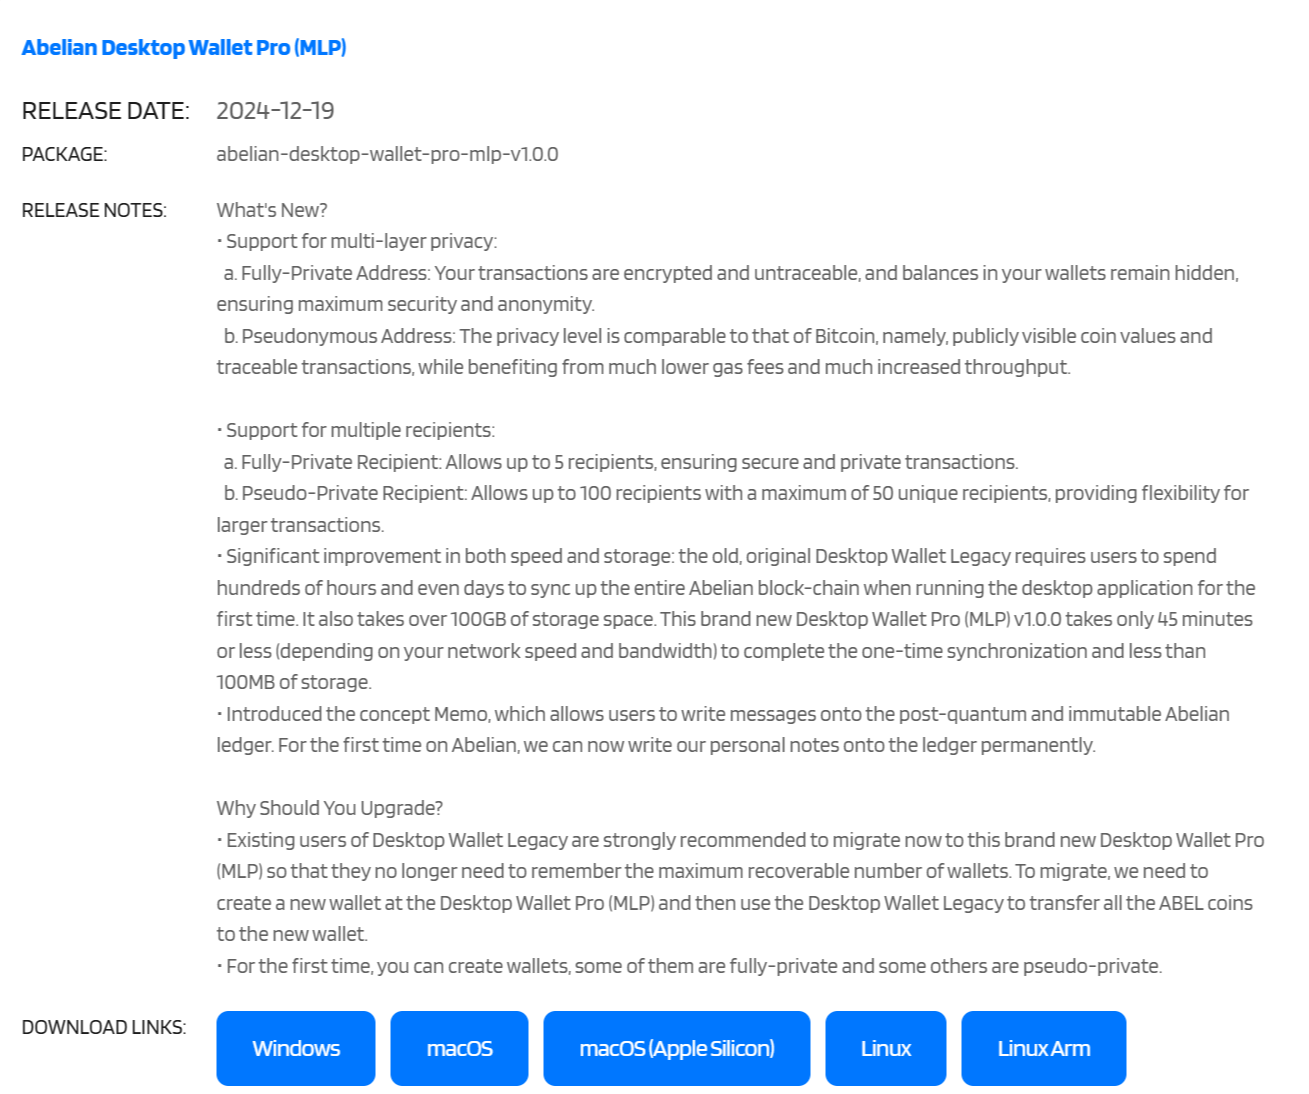 (Download the Abelian Desktop Wallet Pro (MLP) according to your operating system and CPU architecture)
For Windows users, it is essential to confirm that your computer is powered by an Intel/AMD x86-64 CPU, as ARM CPUs are not supported. To verify your processor and system specifications, please follow these steps: Access "System Settings" and then navigate to "System" to find the "Processor/System Type" information.
For macOS users, it's important to identify whether your system is equipped with an Intel chip or Apple Silicon, such as an M1 or M2 chip, as you will need to download the installation package that corresponds to your processor type. To determine your processor and system architecture, click on the Apple logo in the top-left corner of your screen, and then choose "About This Mac -> Overview."
For Linux users, it is crucial to verify that your computer is utilizing an Intel/AMD x86-64 CPU (amd64) or an AMD ARM CPU (arm64), as these are the supported processor. For example, on Ubuntu Desktop, click the system function icon group in the top-right corner of the desktop, click the "Settings" icon in the dropdown menu, and select the "About" tab to view the "Processor/System Type" field.
This tutorial uses the Windows 1.0.0 version as an example:
Save the installation package for the Abelian Desktop Wallet Pro (MLP) to your desktop.

Extract the compressed file to open the Abelian Desktop Wallet Pro (MLP) installer.

Double-click the installer, which will automatically install the desktop wallet for the current user and create a desktop shortcut. After installation, the Abelian Desktop Wallet Pro (MLP) will automatically run.
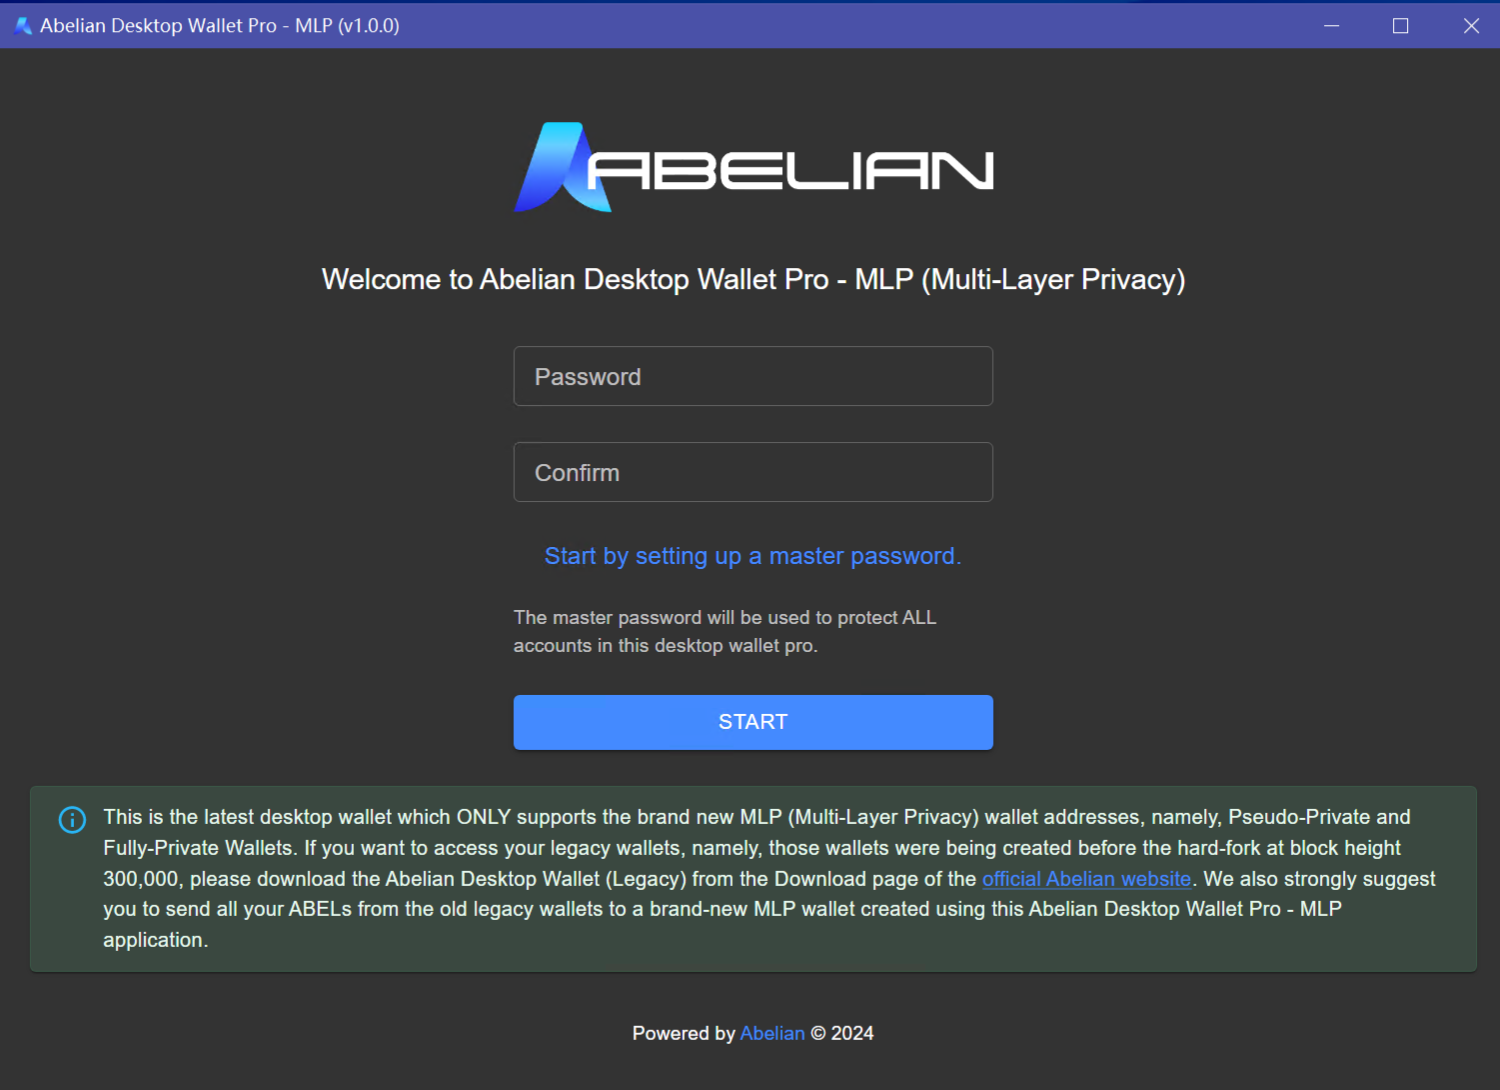
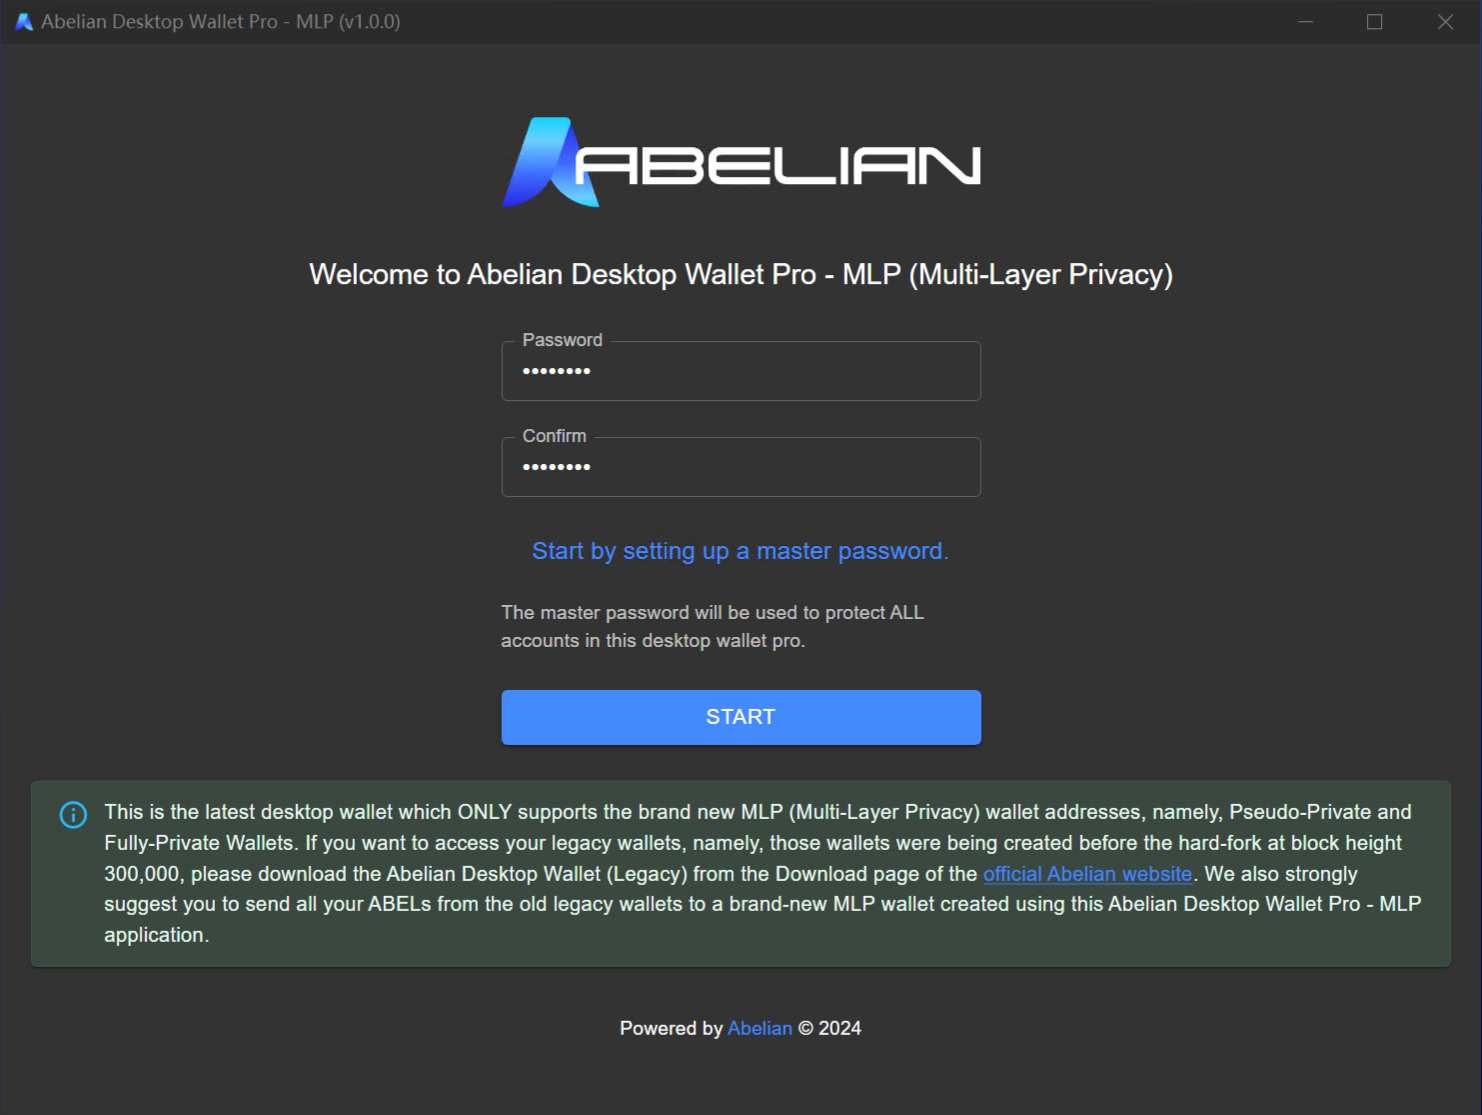
Enter the master password twice and click the "START" button to launch the wallet (the master password is required for local verification each time the desktop wallet is started).
Create an ABEL Wallet Account
To access your Abelian Desktop Wallet Pro (MLP), please enter your master password and then click on the "LOGIN" button tto authenticate and proceed with logging in.

To create an ABEL wallet account:

- Switch to the "STATUS"" tab and then click on the "Select Account" drop-down menu in the top-right corner.
- Select "Create Account" from the drop-down menu.
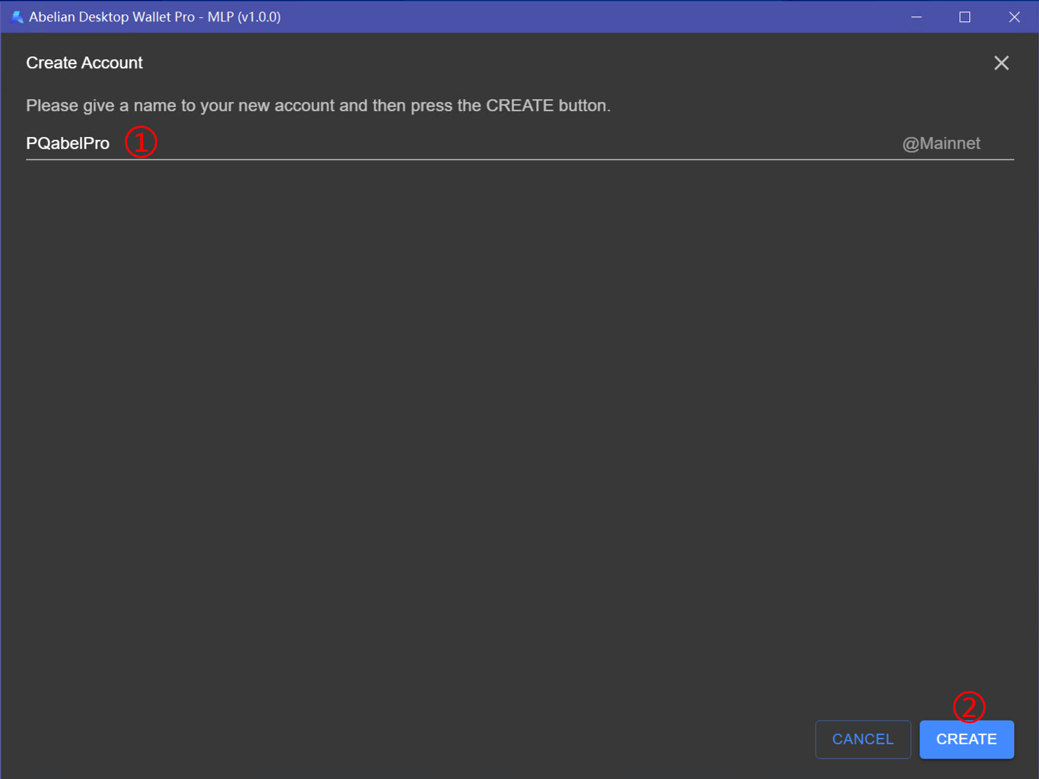
To personalize your experience, please assign a unique and memorable name(case-insensitive) to your wallet. (e.g., "PQabelPro"①), then click on the "CREATE" button
Please patiently await the appearance of thee "Done"① button which signifies the final step in the process. Once it is visible, click on it to successfully complete the creation of your ABEL wallet account.
 (Upon successful account creation, you will be greeted with the confirmation message "Account created." Please proceed once this notification appears.)
Once your account has been successfully established, navigate back to the "STATUS" tab and select the newly created desktop wallet account:
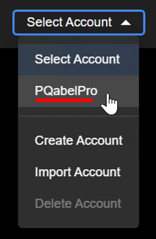
- Click on the "Select Account" drop-down memu in the top right corner.
- Select the newly created account (e.g., "PQabelPro") from the dropdown menu.
- Click on the Start service① button to initiate the wallet synchronization service to download your ABEL wallet data. Click the log button② to view the wallet synchronization logs. The progress bar③ will display the synchronization height and percentage progress in real time.
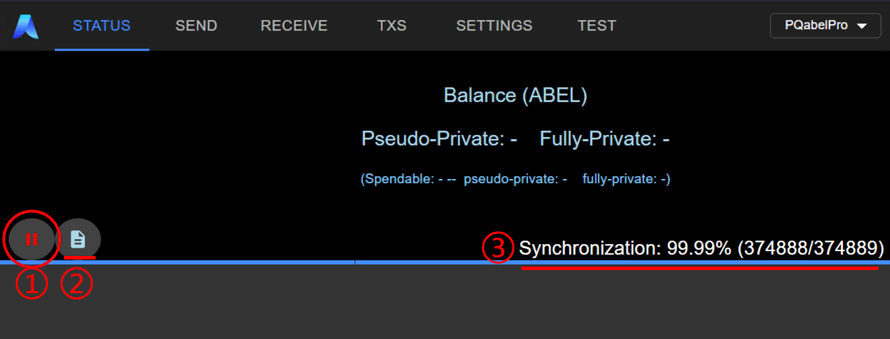
(This brand new Desktop Wallet Pro (MLP) v1.0.0 takes only 45 minutes or less (depending on your network speed and bandwidth) to complete the one-time synchronization and less than 100MB of storage.)
Receive ABEL
Make sure that the wallet synchronization service is active, as mentioned as above; if it's not running, you will be unable to generate a wallet address.
Navigate to the "RECEIVE"① tab. Should there be no existing wallet address, please proceed by selecting the desired privacy type to initiate the creation of a new wallet addresse: "Pseudo-Private"② or"Fully-Private"③, then click the "GENERATE A NEW ADDRESS"④ button.

TIP
Pseudo-private addresses offer less privacy compared to fully-private addresses, but they provide faster transfer speeds. In contrast, fully-private addresses prioritize privacy and security, although this comes at the cost of slower processing speeds.
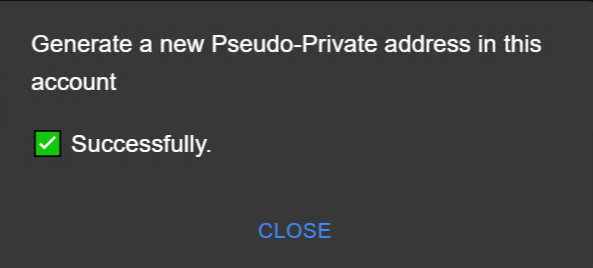
For instance, to create a Pseudo-Private address, please wait until the wallet address is generated, at which point you will see the corresponding status message displayed "Generate a new Pseudo-Private address in this account" changes to "Successfully." Click the "Close" button.
In the "5 Most Recently Generated Addresses" section, the generated address list will be displayed. Click the string next to "Full Address"① to automatically copy the full wallet address to the clipboard; To generate a short wallet address, please click on the "Click to register a unique short address" button next to "Short Address"②.

After successfully generating a short address, click the string next to "Short Address" to automatically copy the short address to the clipboard.

TIP
Once an address is generated, you can use either the full address or the short address to transact (sending and receiving ABEL). Currently, we recommend using the short address as it is easier to save and send due to fewer characters.
Send ABEL
Abelian Desktop Wallet Pro (MLP) offers multi-layer privacy transactions, empowering users to select different levels of privacy based on their needs. The multi-layer privacy feature is designed to enhance transaction anonymity and security. When sending ABEL tokens, you can choose the desired privacy level. For additional features, refer to this guide.
Ensure the synchronization progress reaches to 100% in STATUS tab.
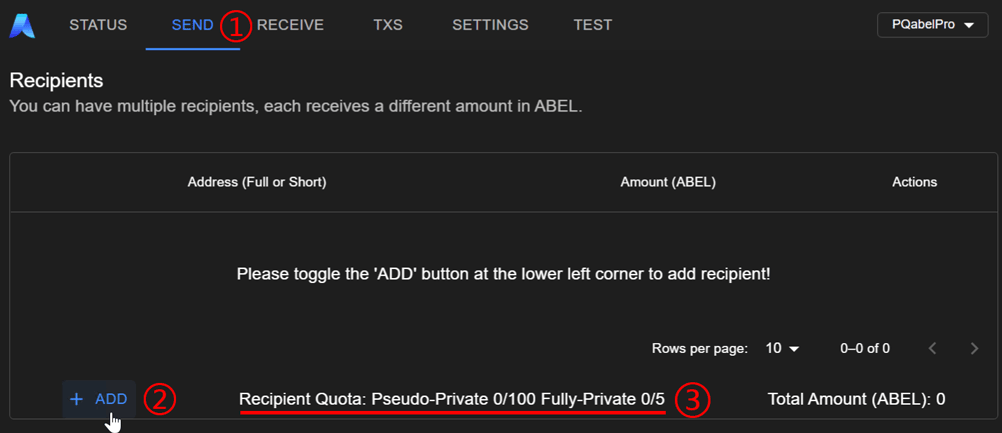
Navigate to the "SEND"① tab. In the "Recipients" section, click the "ADD"② button to batch add recipient addresses and their corresponding amounts. Please be aware of the recipient address quota limit③ to ensure your entries are within the allowed parameters.
Fill in the recipient's wallet address in the "Address (Full or Short)"① field. The system will automatically distinguish between short and full addresses. Enter the amount to be sent (ABEL) in the "Amount (ABEL)"② field, then click the "Save"③ button to complete the addition.

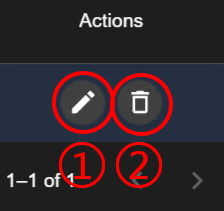
You can also modify the transaction information by clicking the "Edit"① button or remove the transaction by clicking the "Delete"② button.
In the "Input" section, you can view the available balance for transfers. By default,the options for "Spendable Pseudo-Private ABELs"① and "Spendable Fully-Private ABELs"② are checked ensuring that you have a comprehensive view of your spendable funds. However, your primary focus should be on the "Total Spendable ABELs"③ value,as this represents the aggregate amount ready for transactions.
The system is designed to intelligently manage your funds, automatically transferring any insufficient balances to the appropriate privacy address to facilitate your transaction. 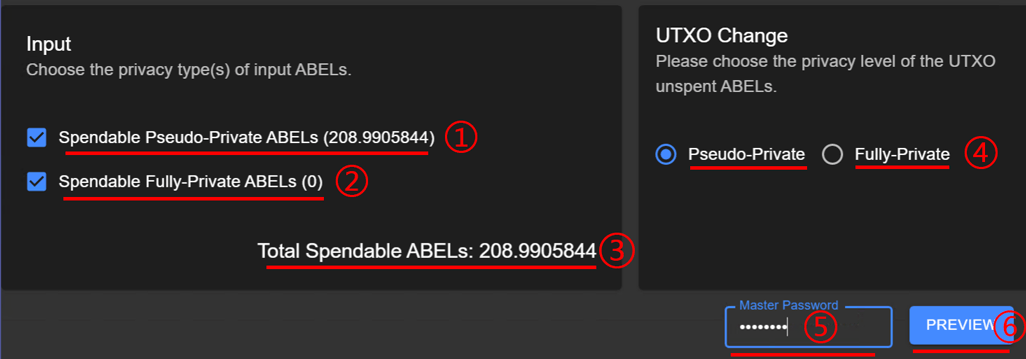
TIP
Newly acquired ABEL tokens will have a short locking period, usually waiting for 20 block heights. These locked amounts will not appear in the spendable balance③ in the Input section.
In the "UTXO Change"④ section, select the privacy type for the transfer address. Enter the "Master Password"⑤ to unlock the desktop wallet Pro, then click the "PREVIEW"⑥ button to view the transaction details.
In the Sending ABELs section, you can check the transaction address, transaction amount①, the privacy address type used for the change account, and estimated fee③.
Please Click on "I WANT TO DOUBLE CHECK IT."④ to return to the "SEND" page for modifications, or click on "I CONFIRM THIS TRANSACTION."⑤ to complete the transfer. 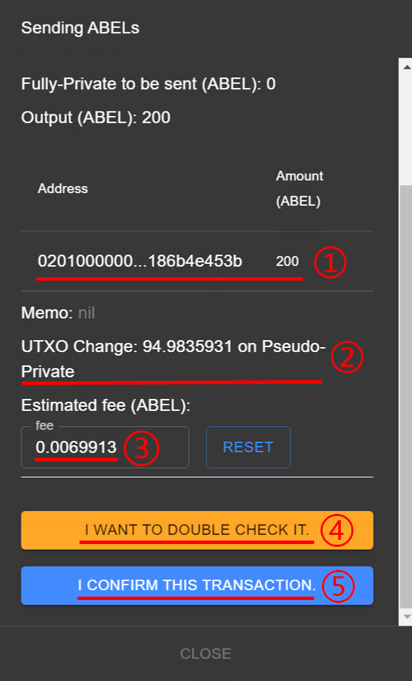 (The Estimated fee s determined by the system's internal algorithms. You have the option to increase the estimated fee to prioritize your transaction and achieve a quicker confirmation time, but you cannot adjust it below the system's default value.)
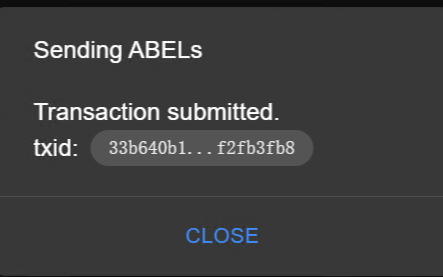
- Upon the completion of a successful transfer, the transaction's unique TXID (Transaction ID) will be prominently displayed for tracking confirmation progress on the blockchain explorer. Click the "CLOSE" button to return to the main page.
View Transaction History
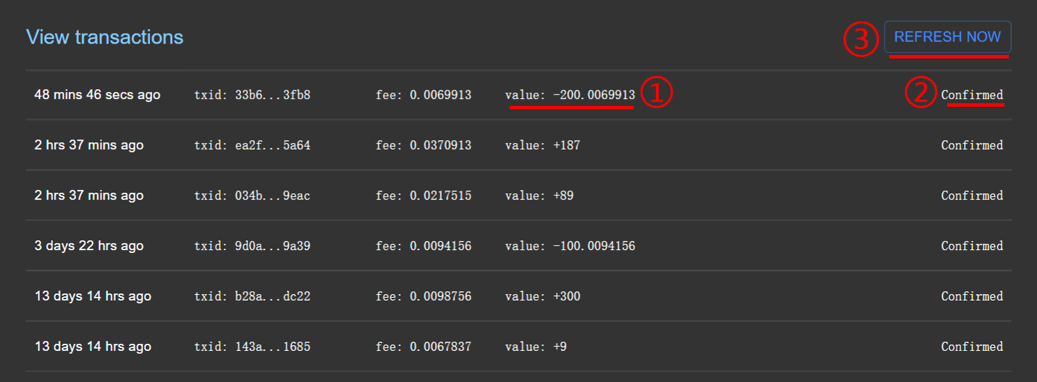
Go to the "TXS"① tab, the "View transactions" section displays the transaction history. When hovering over the txid column②, the full TXID(Transaction ID) is displayed above. Clicking the link icon next to a transaction ID in the txid column② will automatically open the transaction details page on the Abelian Blockchain Explorer. When you submit a new transaction, it will initially be displayed with a status of "Pending"③.

After your transaction has been included in the blockchain and has received 1-5 blocks confirmations, its status will transition from Pending to "Confirmed"② and the transaction amount① will be accurately reflected. If you find that a transaction is missing from your transaction history or its status has not yet been updated to confirmed, you can click on the "REFRESH NOW"③ button in the top-right corner of the section to refresh the transaction list.
Export ABEL Wallet Account
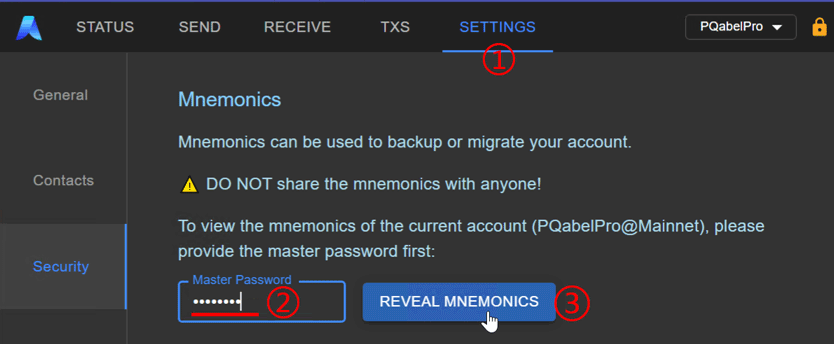
To access your wallet's 24-word wallet mnemonic, which is crucial for recovering your wallet on another device or backing it up, follow these steps:
Navigate to the "SETTING"① tab, enter your master password②, and click on the "REVEAL MNEMONICS"③ button
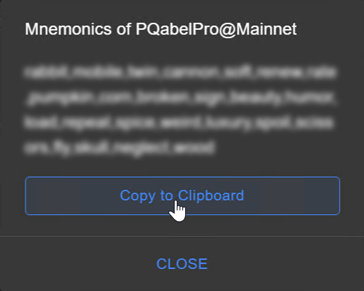
The 24-word wallet mnemonic (recovery phrase) will be displayed shortly. Click "Copy to Clipboard" and paste it into the file to ensure it's saved securely.
Import ABEL Wallet Account
To import an ABEL wallet that was created elsewhere, you'll need to follow a series of steps to ensure the wallet is correctly set up in your new device. Here's a general guide to help you through the process:
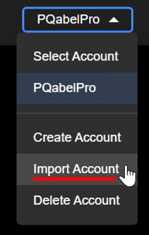
Access the "STATUS"① tab, locate the "Select Account" drop-down list in the top-right corner of the page, and then select "Import Account" optoin.
Enter the wallet name① (case-insensitive) and the 24-word wallet mnemonic②. For example, use the name "PQabelPro2," then click the "IMPORT"⑤ button.
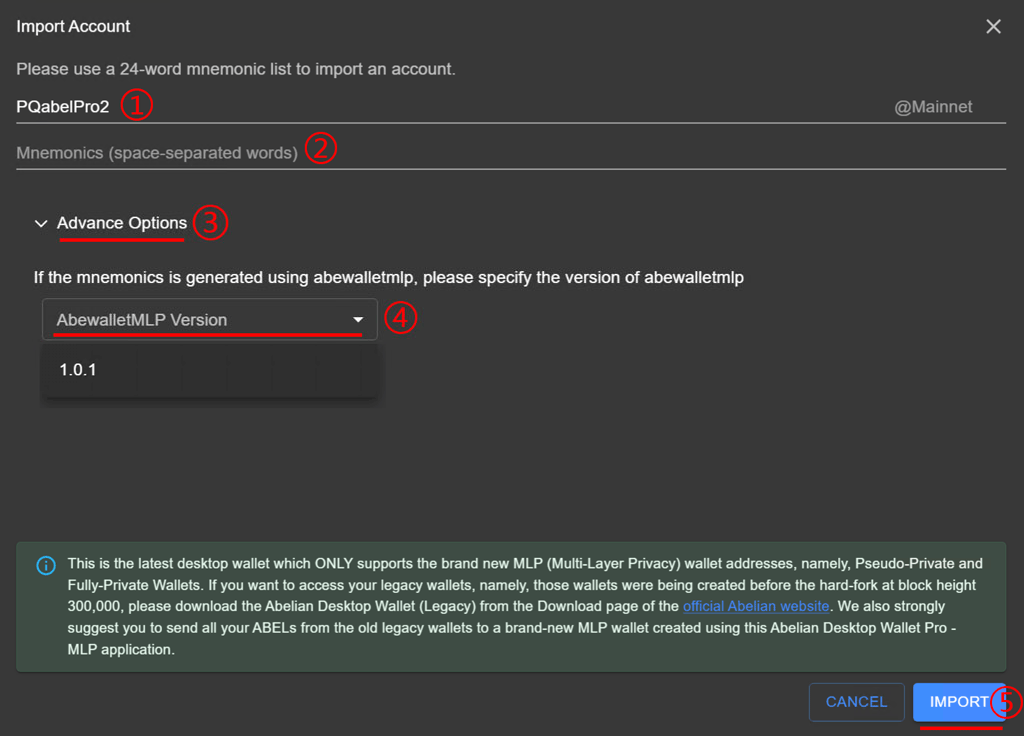
[Optional] To import mnemonics from Abelian Multi-Layer Privacy Wallet (CLI) (AbewalletMLP), click "Advance Options"③ to expand more options, then select "AbewalletMLP's Version"④ and choose the corresponding version.
TIP
The Desktop Wallet Pro does not support importing 24-word wallet mnemonics from Abelian Legacy Wallet (CLI) (AbewalletLegacy) or Desktop Wallet Legacy. In addition,When importing mnemonics from Abelian Multi-Layer Privacy Wallet (CLI) (AbewalletMLP), please adjust the delimiter "comma (,)" with a "space ( )" for new format.
- After the message "Account imported." appears, click the "DONE" button to complete the wallet account import.

Migration from Legacy Wallet
If you are still using Abelian Desktop Wallet Legacy, you can migrate your legacy accounts to Abelian Desktop Wallet Pro (MLP) —unlock enhanced privacy and flexibility!
For detailed migration instructions, please refer to the Migration Steps in the Desktop Wallet Legacy User Manual.
Important!
The Abelian Desktop Wallet Pro (MLP) now supports transfers with the latest version of the Abelian Desktop Wallet (Legacy)!
The latest version of the mobile wallet - Abelian Pro, has also added support for importing the mnemonic phrase of the Abelian Desktop Wallet Pro (MLP) account, enabling seamless cross-platform usage!