Abelian Desktop Wallet Legacy User Manual
The Abelian Foundation has developed the desktop version of the Abelian wallet, which empowers users to create ABEL wallet accounts through an intuitive graphical interface. Additionally, users can export a 24-word mnemonic phrase for wallet recovery, import existing ABEL wallet accounts, send or receive ABEL tokens, and manage multiple ABEL wallet instances within a single Abelian Desktop Wallet Legacy.
What's New?
- One-Click Migration: We strongly recommend migrating from legacy wallets to MLP wallets. An MLP wallet no longer needs users to remember the maximum recoverable number of wallets. This enhances the usability greatly. Furthermore, we will only supports the brand-new MLP wallets and fades out the legacy wallet type.
- You need to install the Desktop Wallet Pro v1.0.0 and create a new wallet (fully-private or pseudo-private type). Then, use the Abelian Desktop Wallet Legacy wallet and use the Migration function to transfer all the ABEL coins from each legacy wallet to the new MLP wallet.
Why Should You Upgrade?
- The MLP wallet address is significantly easier to use without remembering any sequence number (aka maximum recoverable number of wallets). Furthermore, for the first time, you can choose to create multiple MLP addresses, each with different privacy level, fully-private or pseudo-private.
This user guide is designed to provide comprehensive instructions for the installation, configuration, and utilization of the features within the Abelian Desktop Wallet Legacy.
Download and Installation
Please visit the Abelian official website download page to obtain the installation package for the Abelian Desktop Wallet Legacy. It is essential to download the appropriate version based on your operating system and CPU architecture, as depicted in the figure below:
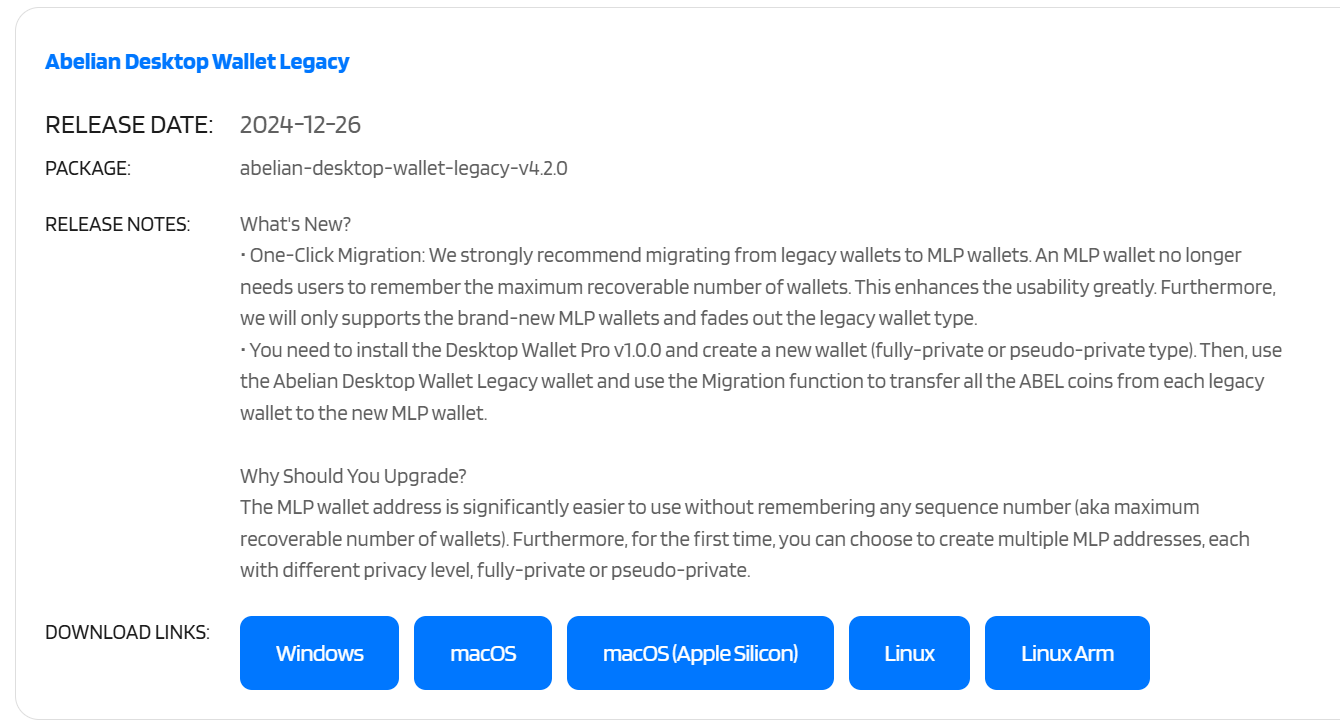
Windows Users: Ensure that you are using an Intel/AMD x86-64 CPU (ARM architecture CPUs are not supported). To verify your processor and system type, go to “System Settings -> System -> Processor/System Type.”
Mac Users: Verify that you are using an Intel chip or Apple Silicon (such as M1/M2 chips). Download the corresponding installation package based on your processor. To check your processor and system type, click the Apple logo in the top left corner of the desktop and select “About This Mac -> Chip.”
Linux Users: Confirm that you are using an Intel/AMD x86-64 CPU (amd64) or AMD ARM CPU (arm64). Download the appropriate installation package based on your processor. For instance, in Ubuntu Desktop, click the system icon group in the top right corner of the desktop, select the “Settings” icon from the dropdown menu, and check the “About” tab to view the “Processor/System Type” section.
This tutorial uses Windows version 4.2.0 as an example:
Save the Abelian Desktop Wallet Legacy installation package to your desktop, as illustrated below:

Double-click the compressed file to initiate the installation program for the Abelian Desktop Wallet Legacy, as shown here:

Double-clicking the installer will automatically install the desktop wallet for the current user and create a desktop shortcut, and subsequently run the desktop wallet, as depicted in the following image:
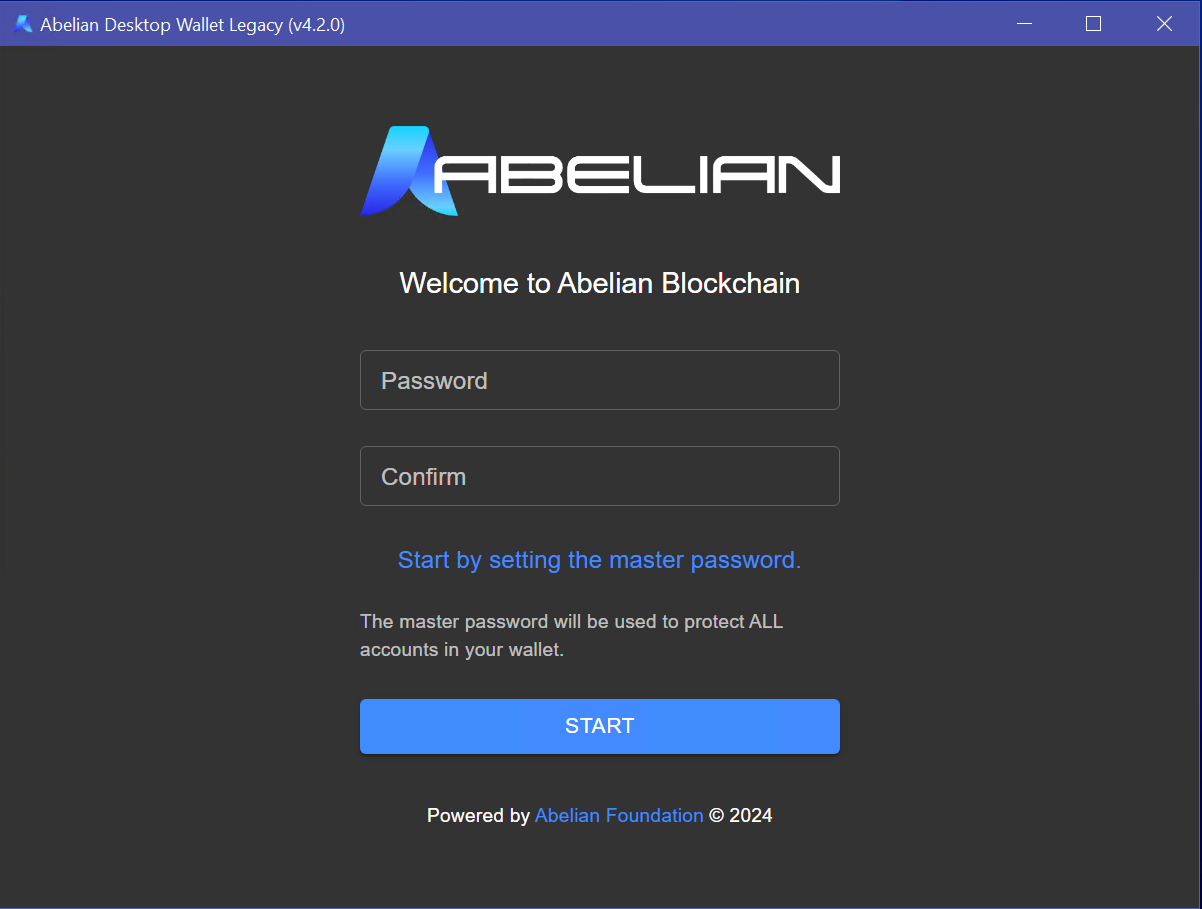
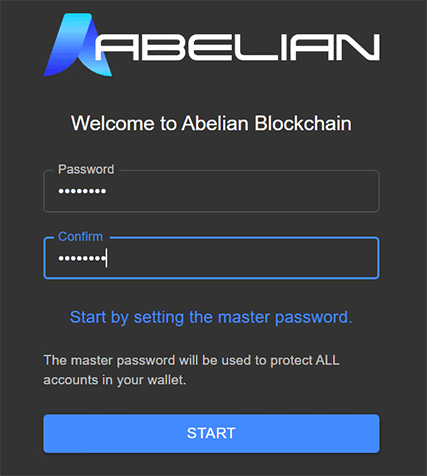
Enter your master password twice and click the “START” button to launch the wallet (you will need to enter the master password for local verification each time you start the desktop wallet).
Create an ABEL Wallet Account
Enter your master password and click the “LOGIN” button to access the Abelian Desktop Wallet Legacy, as shown as below:

To create an ABEL wallet account, follow these steps:

- Click “Select Account” in the upper right corner.
- Choose “Create Account” from the dropdown menu.
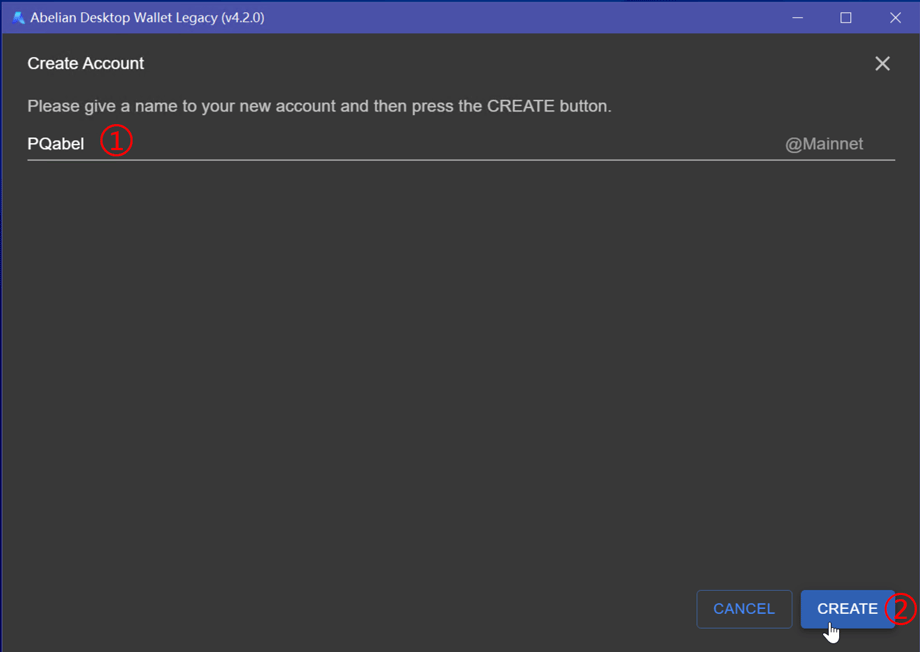
Name your wallet (e.g., “PQabel”①) and click the “CREATE”② button, as illustrated below:
Wait until the “Done”① button appears, then click it to complete the creation of the ABEL wallet account. Upon successful creation, you will see the message “Account created.”②, as depicted in the following image:

Select the newly created desktop wallet account by following these steps:
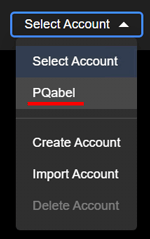
- Click “Select Account” in the upper right corner.
- Choose the “PQabel” account from the dropdown menu.
Click the “Start service”① button to synchronize your ABEL wallet data. The “View service log”② button on the left allows advanced users to dtroubleshoot any synchronization issues that may arise, as shown below:

Receive ABELs
Ensure that the wallet synchronization service is active and the synchronization status has reached 100%.
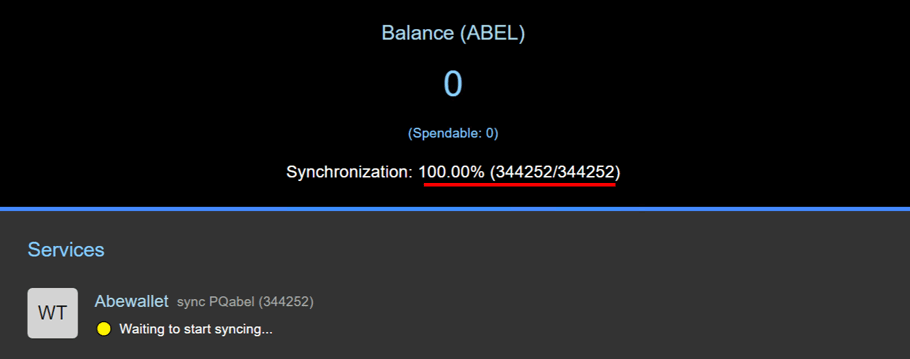
Navigate to the “RECEIVE”① tab. If there are no wallet address instances, you need to create one by following these steps:
- Click the “More...”② button with three dots, and select “Add address”③ from the dropdown menu.

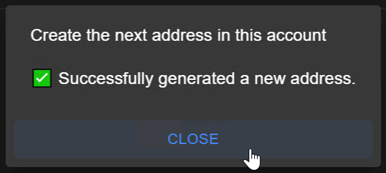
- Wait for the wallet address instance to be generated until you see the message “Successfully generated a new address.” Then click the “Close” button, as shown below:
- Click the “Select address”① button (book icon) to choose the wallet address you just created②.

- The “Address” field displays the long address①. Clicking the long address string will automatically copy the wallet long address to the clipboard; clicking the “Short Address” field and then the “Click to register a unique short address.”② button will generate a short wallet address, as demonstrated below:

- After successfully generating the short address, you will see the message “Registration succeeded. Click to continue.” Subsequently, clicking the string in the “Short Address” field will automatically copy the wallet short address to the clipboard, as shown in the following image:

- Click the “More...”② button with three dots, and select “Add address”③ from the dropdown menu.
Once the address is generated, you can utilize either the long wallet address or the short address for transactions (sending and receiving ABEL).
Send ABELs
Navigate to the “SEND” tab and click “PASTE FROM CLIPBOARD”① or “IMPORT FROM FILE”② to input the recipient's wallet address, as depicted below:

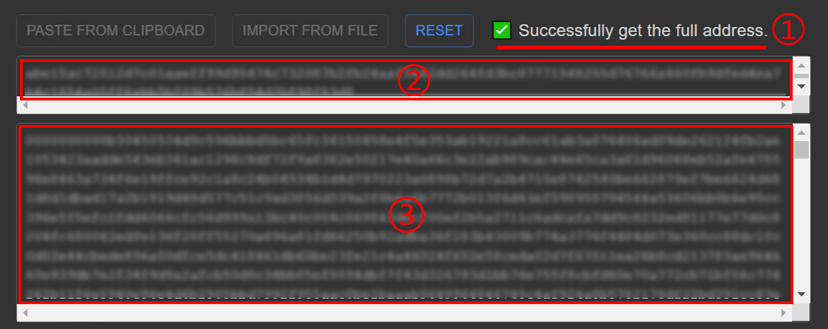
If the pasted or imported address is a short address②, the system will automatically recognize and resolve it to a long address③. Upon successful resolution, you will see the message “Successfully get the full address.”①, as shown in the following image:
Enter the amount① and your master password②, then click the “SEND”③ button to submit the transaction, as illustrated below:

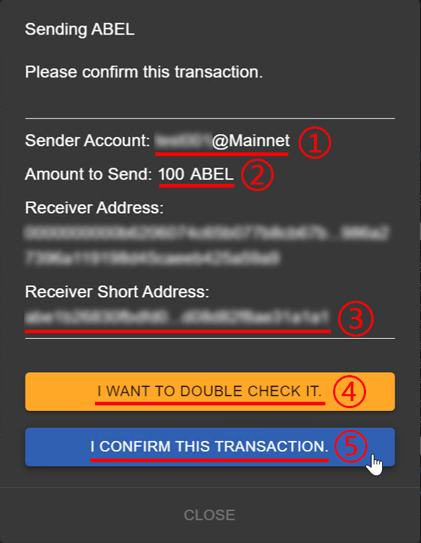
After submission, a transaction preview window will pop up, allowing you to review the sending wallet account①, transaction amount②, and recipient wallet address③. You can click the “I WANT TO DOUBLE CHECK IT.”④ button to return to the previous “SEND” page for modifications, or you can click the “I CONFIRM THIS TRANSACTION.”⑤ button to complete the transaction, as demonstrated below:
View Transaction History
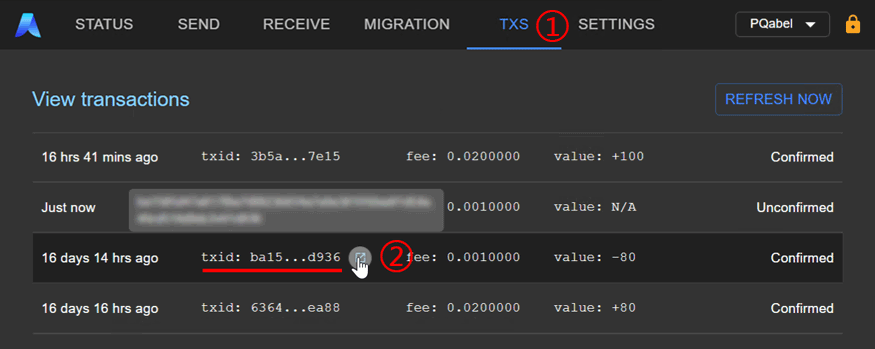
- Navigate to the “TXS”① tab to view the transaction history. When hovering over the txid column②, the full txid will be displayed at the top. Clicking the link icon will automatically redirect you to the Abelian Blockchain Explorer to display the details of the transaction.
Export ABEL Wallet Account
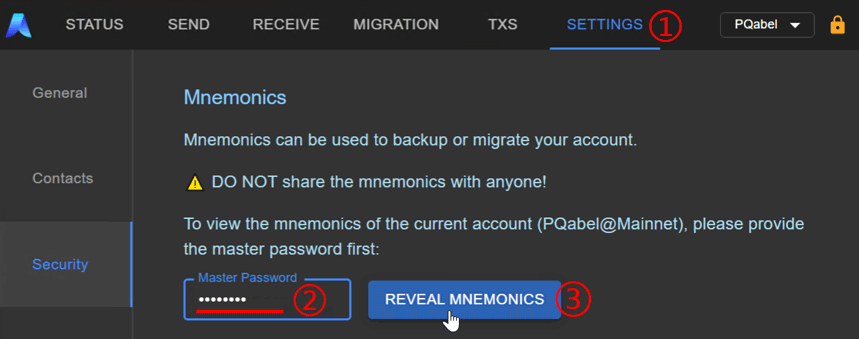
Navigate to the “SETTING”① tab, enter your master password②, and click the “REVEAL MNEMONICS”③ button, as depicted below:
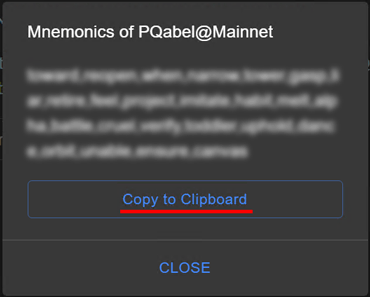
A list of 24 words representing your wallet mnemonic (recovery phrase) will appear. Click “Copy to Clipboard” and paste it into a local text file for safekeeping.
Version 4.3.0 introduces a new text prompt: "Local maximum sequence number," which is used to specify the number of recovery addresses when importing a Legacy wallet account.

Import ABEL Wallet Account
TIP
After upgrading the desktop wallet legacy version from 4.1.1 or earlier to version 4.2.0, you will need to re-import wallet accounts. Starting from version 4.2.0, it is no longer necessary to synchronize Abelian node (Abec) data, significantly improving synchronization speed and reducing disk space usage.
To import an ABEL wallet created elsewhere, follow these steps:
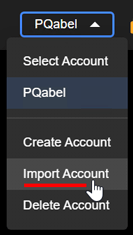
Click “Select Account” in the upper right corner, then select “Import Account,”as shown in the figure below:
Enter the wallet name①, the mnemonic phrase of 24 words②, and click on the “Number of Addresses to Recover”③ field, which will prompt a dialog box. Click the “OK”④ button.

TIP
You need to estimate the number of addresses to recover. Here are three reference methods:
a. If the desktop wallet is version 4.1.1, you can refer to the steps for Receiving ABELs to create a new address, then check the newly created address name suffix in the “Select address” dropdown menu. The suffix wallet name#m number indicates the number you should fill in for the number of addresses to recover.
b. If the desktop wallet is lower than version 4.1.1 and method a fails to create a new address, you can check the transaction count in the TXS tab. Multiply this number by 2, and if the wallet has been imported before, add the number of addresses filled in during the last recovery.
c.If the mnemonic phrase exported from version 4.3.0 contains the text "Local maximum sequence number," you can directly enter the value here.
d. If the wallet version is too old to run and check transaction records, you can estimate a number for the recovery address count, such as 100. However, avoid entering unrealistic or excessively large values to prevent the program from crashing
- The system will automatically generate the corresponding number in the recovery address instance count field. Click the “IMPORT” button, you will later see the message “Account imported.”. Click the “DONE” button to complete the wallet account import.

Migrating ABEL Legacy Wallet to Multi-layer Privacy Wallet Account
The Abelian Foundation has developed the Multi-layer Privacy Wallet, which supports creating multi-layer privacy wallet accounts on the desktop. Users can choose the corresponding type for transactions based on their privacy needs. However, the Abelian Desktop Wallet Legacy does not support creating multi-layer privacy wallet addresses, so you need to migrate the legacy wallets to the MLP wallets.
This migration process will transfer all balances from the legacy wallet to the multi-layer privacy wallet,follow these steps:
Navigate to the “MIGRATION”① tab and click “PASTE FROM CLIPBOARD” or “IMPORT FROM FILE”② to input the recipient's multi-layer privacy wallet address.
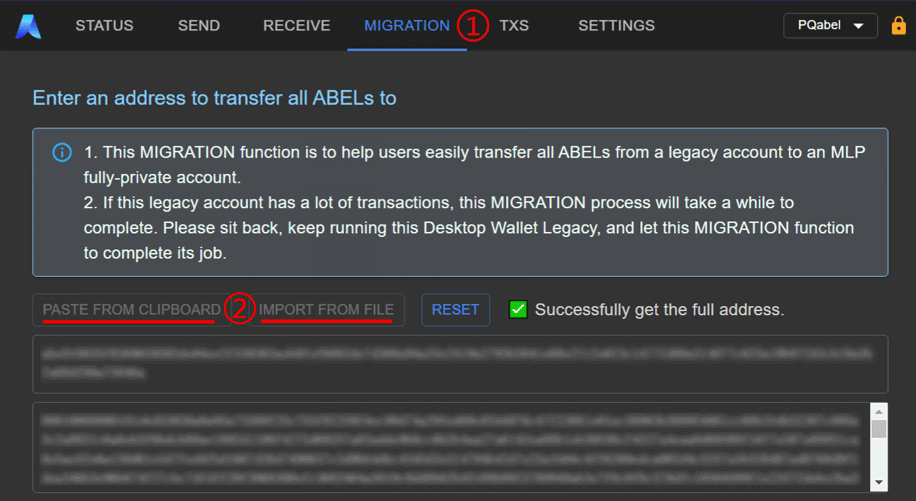
Enter your master password① and click the “BEGIN”② button to proceed with the migration. The amount will show the “Spendable” amount for this migration.

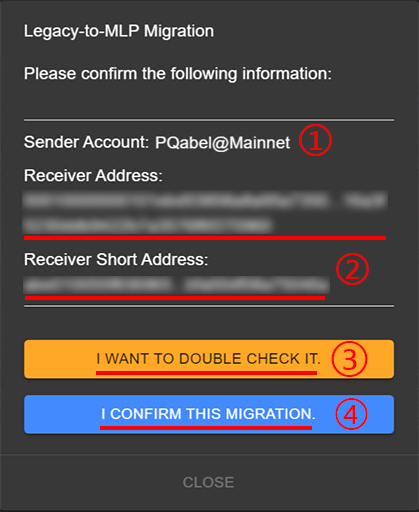
A prompt will pop up to preview the wallet account① and the target wallet address② for the migration. You can click the “I WANT TO DOUBLE CHECK IT.”④ button to return to the previous “MIGRATION” page for modifications, or you can click the “I CONFIRM THIS MIGRATION.”⑤ button to submit.
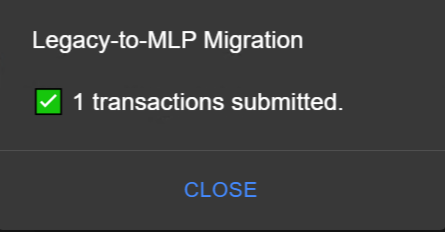
After submission, a progress window will display until you see the message “N transactions submitted.” indicating the completion of the wallet migration operation, as shown in the following image:(the number (N) of transactions submitted is determined by the quantity of coins in the account)
Navigate to the “TXS” tab to view the corresponding transaction record. When the final status shows “Confirmed,” it signifies that the migration was successful.
TIP
After upgrading the desktop wallet legacy version to 4.2.0, it is recommended that users migrate to the Desktop Wallet Pro (MLP). The professional version does not require filling in the address count option during wallet import operations and is more user-friendly for large amount transfers, avoiding the “allowed max number 5” error in most cases.