WARNING
The redesigned version of the QDay testnet is about to launch, and this tutorial and related links are now outdated! Stay tuned for the arrival of the new tutorial!
ABEL Testnet Staking Service
The ABEL Testnet staking service allows users to participate in network security and earn rewards by staking wAbel tokens.
ABEL Staking wAbel Test Tokens
Open the ABEL Testnet staking service URL on QDAY Testnet: ABEL Staking or ABEL Staking 2.
Explanation of ABEL Staking Page Sections
- From Network
- Select the blockchain network from which you want to withdraw ABEL tokens, default is “Abelian Testnetwork” (default and non-selectable).
- To Network
- Select the target blockchain network for staking QDay tokens, default is “QDay Testnetwork” (default and non-selectable).
- From Address
- Enter the wallet address where your ABEL tokens are stored on the selected network.
- To Address
- Enter the wallet address where you want to stake the tokens, usually your currently connected MetaMask wallet address.
- Amount of ABEL to deposit
- Enter the amount of ABEL tokens you wish to stake.
- Lock-up period
- Select the duration for which you want to lock your staked funds; the longer the lock-up period, the higher the potential rewards.
- Reward ratio
- Select the reward ratio you wish to receive for staking, the specific ratio will vary according to the platform's policy (automatically generated and non-selectable).
- Generate QR Code for Abelian Pro
- Click this option to generate a QR code for easy transfer of ABEL tokens using the scan function of the Abelian Mobile Wallet Pro.
ABEL Staking Exchange wAbel
1. Connect Wallet
If you have already connected your MetaMask wallet on the previous QDay staking page, you can skip this step.
- Click the “Connect” button at the top right of the page and select MetaMask to start connecting;
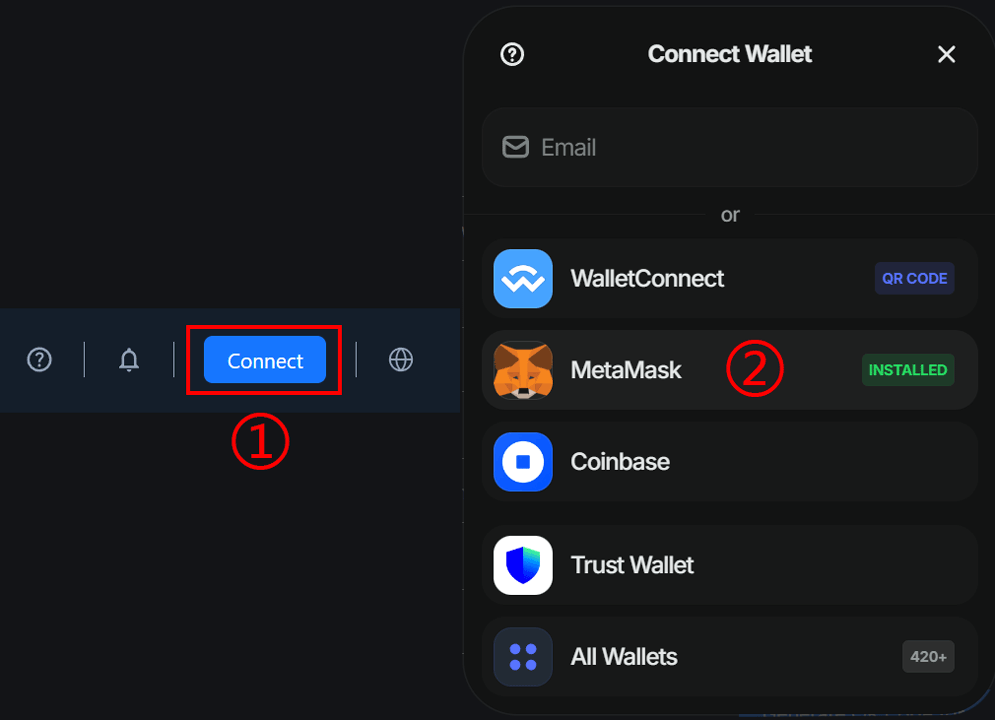
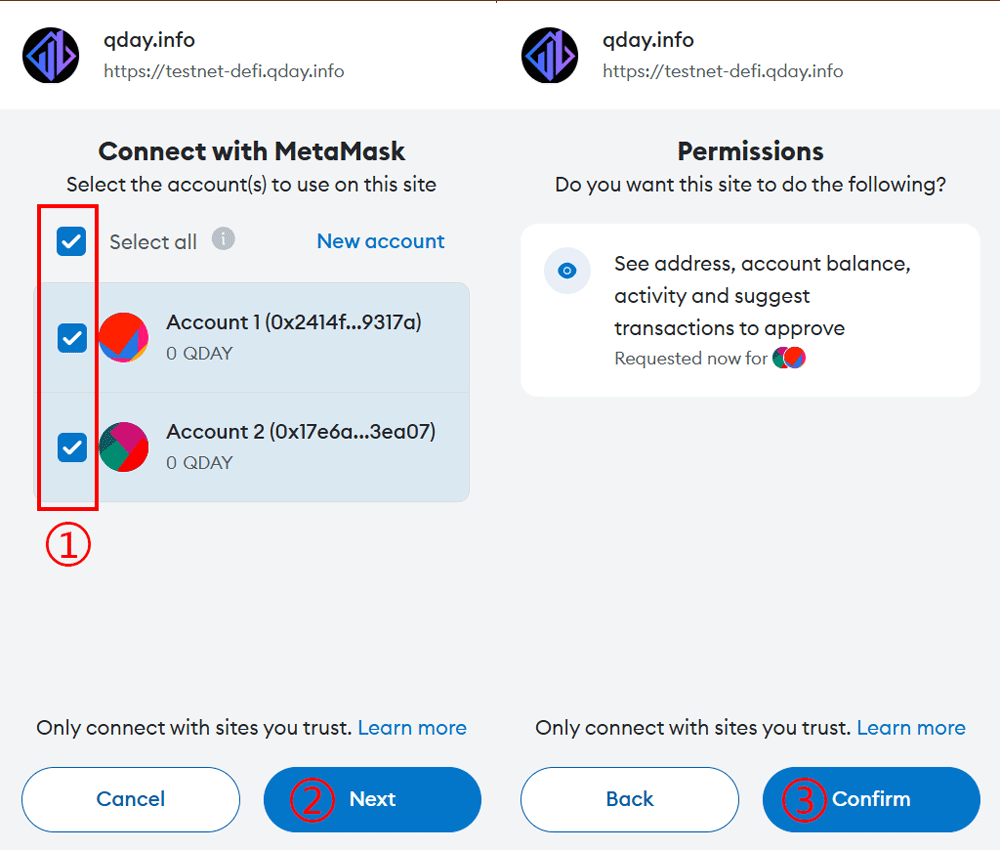
- In the pop-up window, select the wallet you need to connect and authorize.
- After connecting, the top right corner of the page will display the currently connected wallet address.

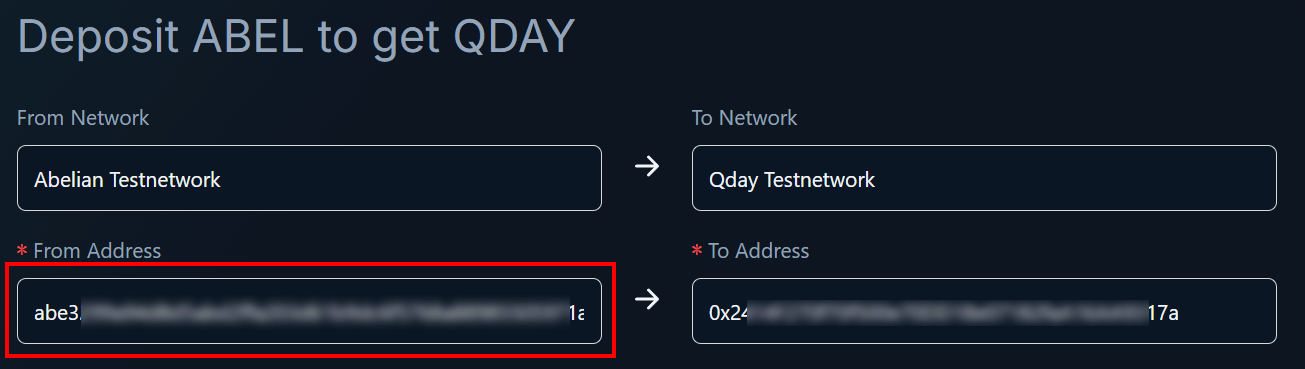
2. Enter Transfer Wallet Address
- In the “From Address” field, enter the ABEL wallet address, and the “To Address” field will automatically select the currently connected MetaMask wallet address;
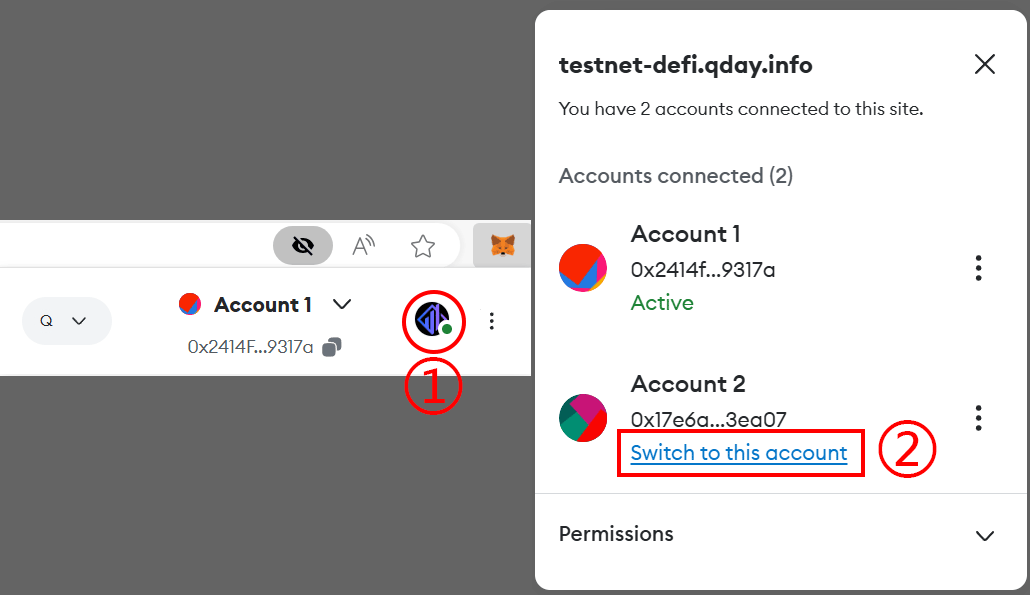
- If you need to switch wallet addresses, click the MetaMask icon in the browser toolbar, click the dropdown icon next to the account name at the top middle of the pop-up window to access the account list, and click any wallet account in the list to switch to that wallet address.
3. Select Staking Amount and Lock-up Period
In the “Amount of Abel to deposit” field, enter the amount of $ABEL tokens you wish to stake. In the “Lock-up period” field, select the lock-up period you want for staking (default options are 6, 9, and 12 months). The “Reward ratio” field will automatically generate the staking reward ratio (default options for the lock-up period are 10%, 20%, and 30%). 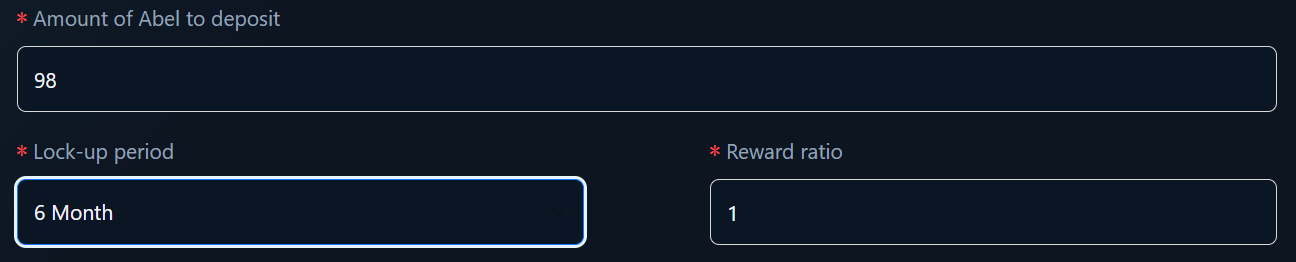 (In the example, only 98 ABEL tokens are transferred)
4. Generate QR Code
Click the “Generate QR Code for Abelian Pro” button, and a QR code will be automatically generated shortly. 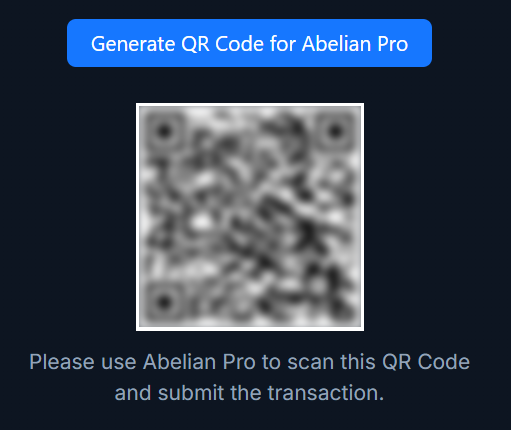
5. Transfer Using Mobile Wallet
Open the Abelian Mobile Wallet Pro app, click the “Send” button, then click the “Scan” icon at the top right, scan the QR code generated in the previous step, and confirm the transfer operation. 
6. Wait for Transaction Completion
After submitting the transaction, click “Back to home” to return to the main interface. In the “Transactions” section, check the recent transactions, click the transaction to view the “Transaction Details” page to check the transaction status, or click “View on AbelScan” to visit the Abelian block explorer to check the transaction status. 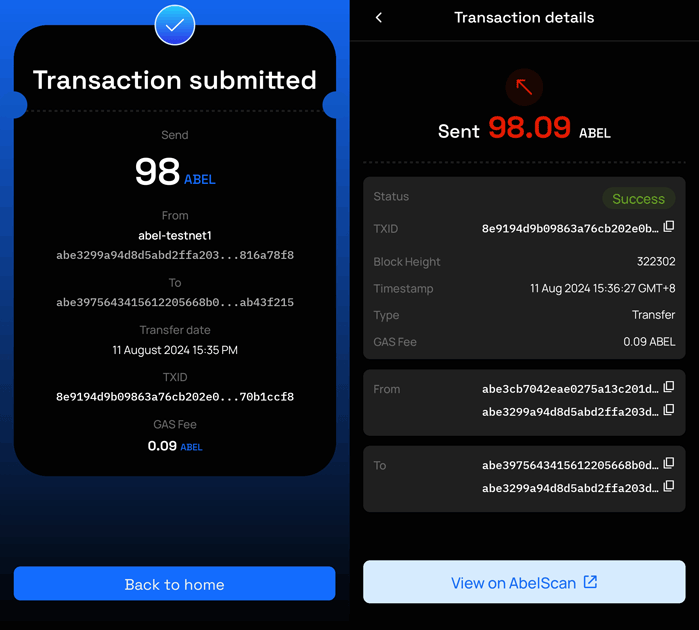
7. Staking Query
(The first round of staking test on the testnet has ended. To experience the functionality described in this document, please wait for us to reopen the test.)