WARNING
The redesigned version of the QDay testnet is about to launch, and this tutorial and related links are now outdated! Stay tuned for the arrival of the new tutorial!
QDay Testnet Decentralized Exchange (DEX)
QDay Testnet DEX
QDay Testnet DEX is an efficient and secure decentralized trading platform that supports asset exchange in a quantum-safe environment.
Open the QDAY Testnet DEX URL: testnet-swap.qday.info or testnet-swap.abelqday.io.
1. Connect Wallet
Before starting to trade, you need to connect your previously created MetaMask wallet account.
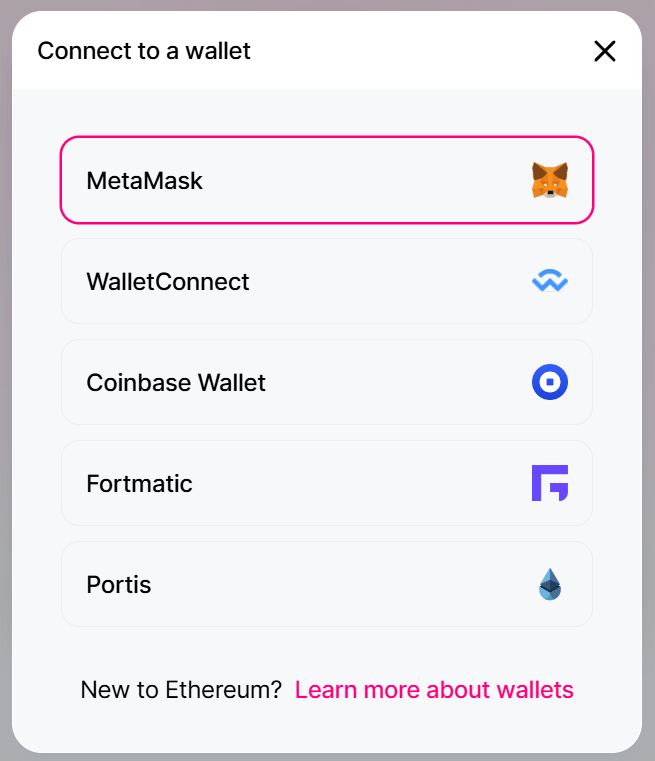
- Click the “Connect to a wallet” button at the top right of the page;

- Select MetaMask wallet from the list;
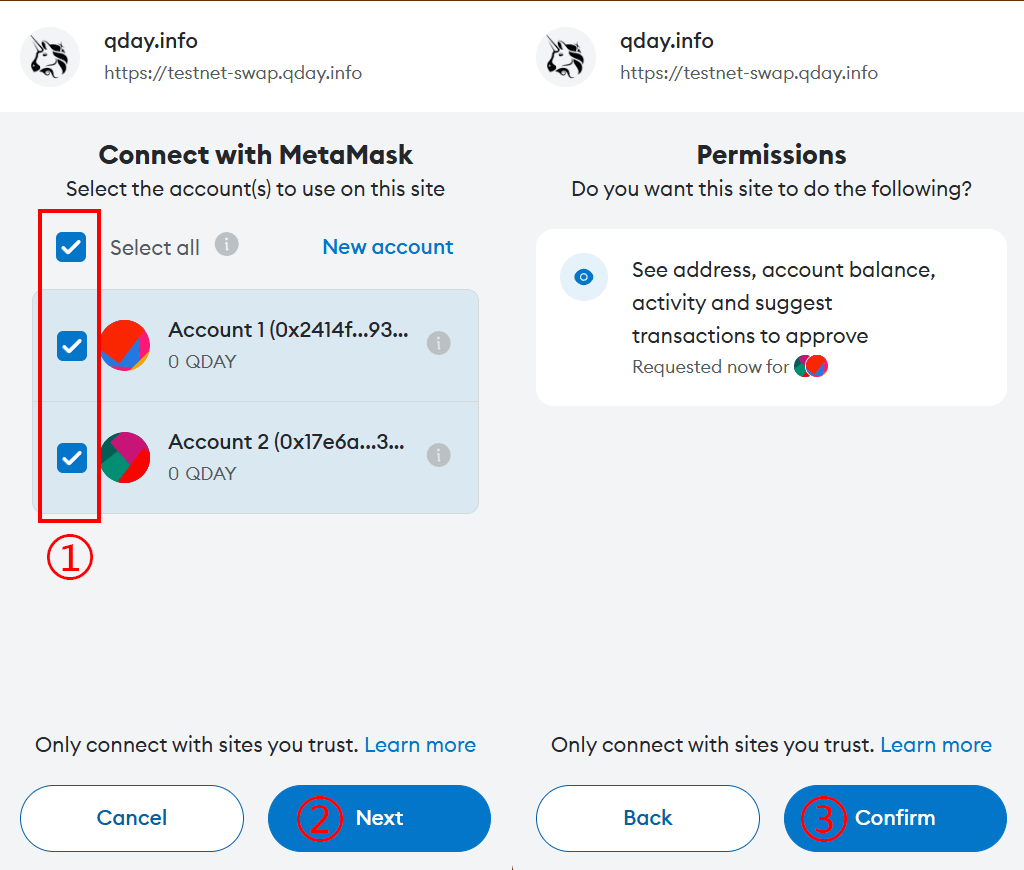
- Follow the wallet prompts to select the wallet you need to connect, then select next and authorize to complete the connection. In the example, Account1 and Account2 test accounts are selected.
2. Select Trading Pair
After connecting the wallet, select the tokens you want to trade in the “Swap” tab:
- In the “From” section, select the token you want to sell. In the example, the default token QDAY is selected.
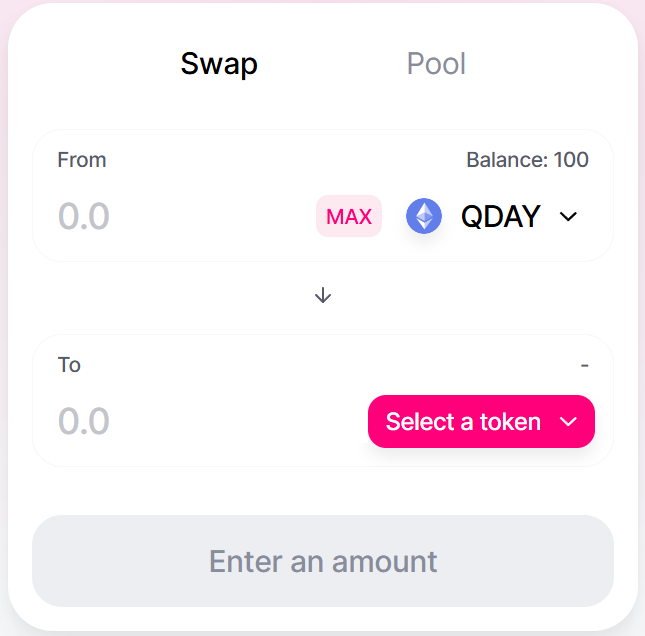
- In the “To” section, select the token you want to buy. You can click "Select a token" to browse the available token list.
 Here, select the ERC20 token (pqUSD) previously added to MetaMask.
3. Enter Transaction Amount
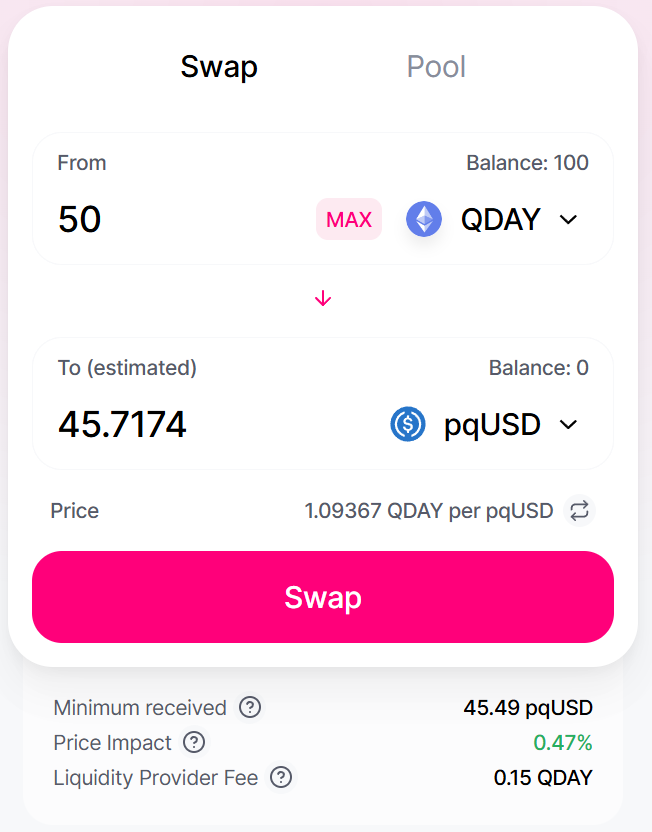
- Under the “From” token you selected, enter the amount you wish to trade. The system will automatically calculate the amount of target tokens you will receive.
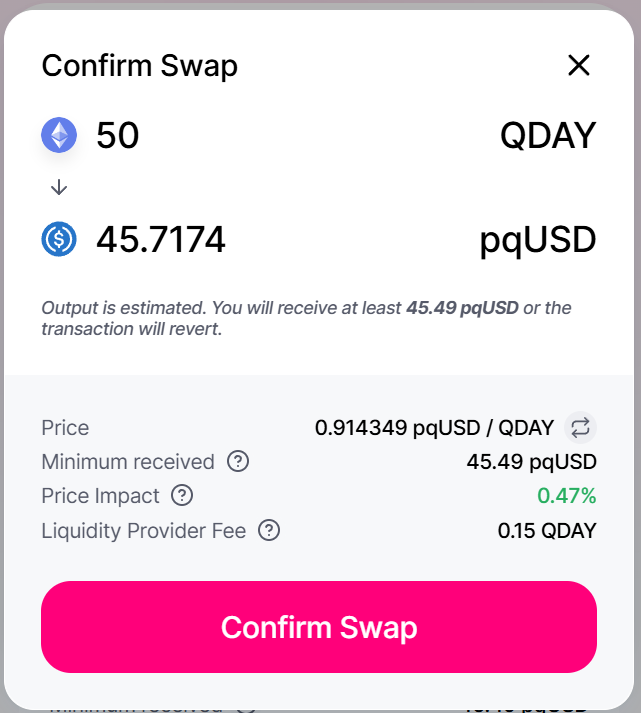
4. Review Transaction Information
After entering the transaction amount, you can review the detailed transaction information, including:
- Minimum price for the transaction
- Exchange rate
- Fees
5. Confirm Transaction
When you confirm that the transaction information is correct, you can proceed with the following operations:
- Click the “Swap” button;
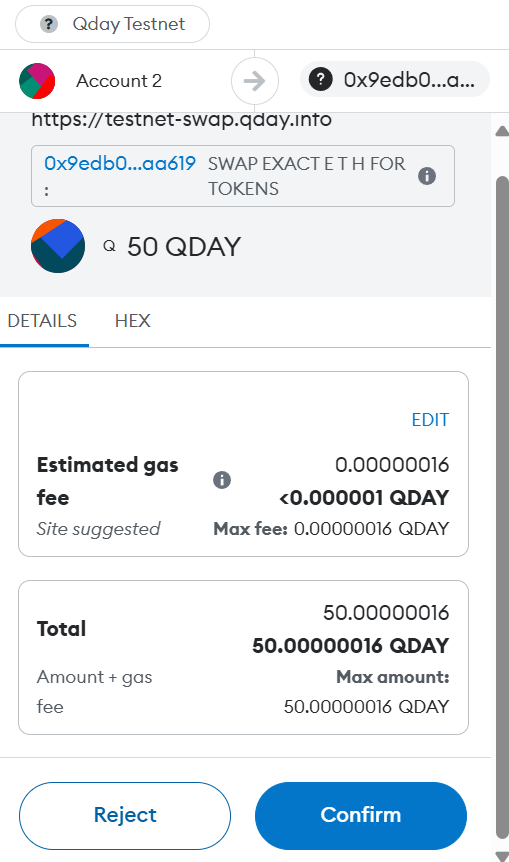
- After confirming the transaction details, click the “Confirm Swap” button;
- In the pop-up MetaMask wallet, click the “Confirm” button to confirm.
6. Check Transaction Status
- After confirming, you can check the transaction status in your wallet;
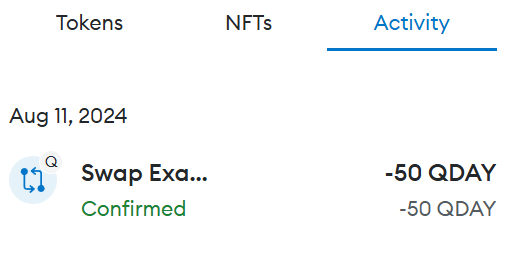
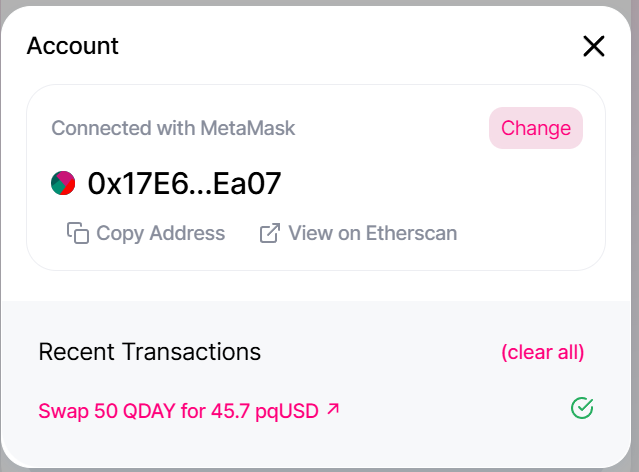
- Or return to the DEX and click the wallet address at the top right. In the pop-up wallet details, check the transaction history.
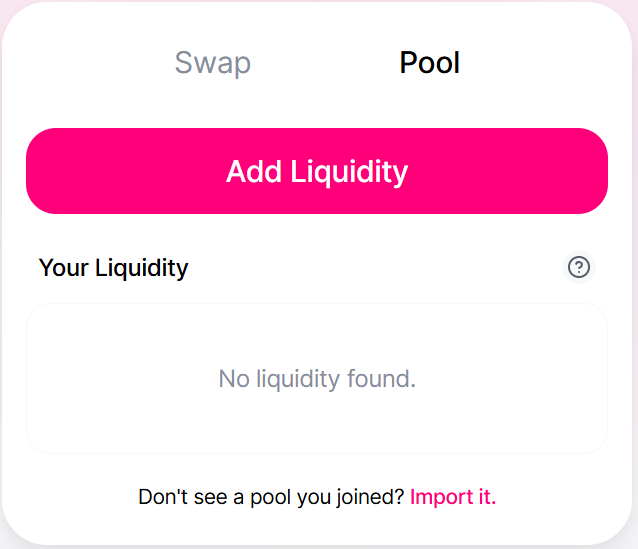
7. Add Liquidity (Optional)
Switch to the “Pool” tab on the DEX page to add liquidity.
- Click the “Add Liquidity” button.
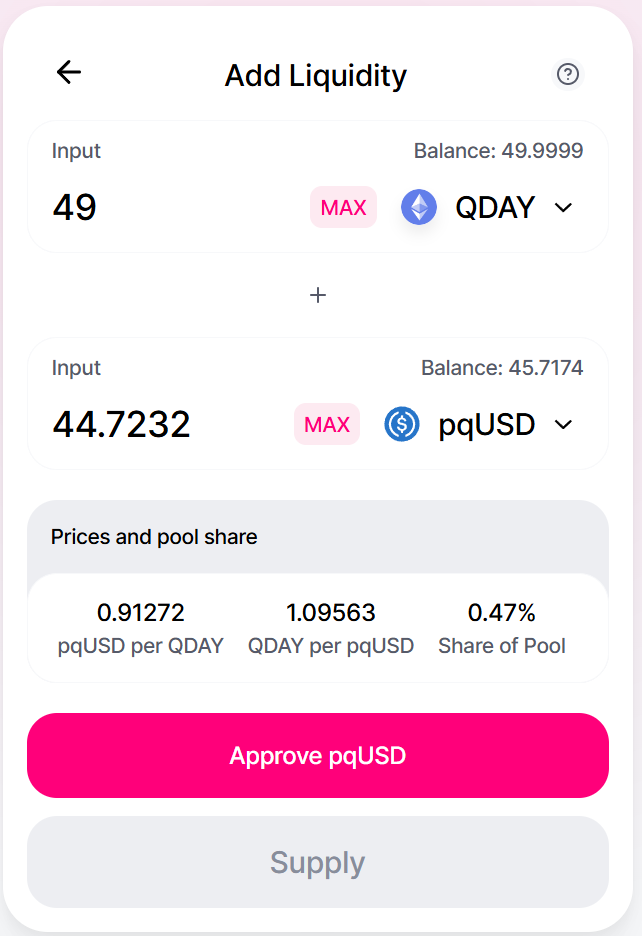
- Add a token pair, select QDAY in the first field, and pqUSD in the second field. Enter the amount you wish to add and confirm the liquidity details, then click “Approve pqUSD” to continue.
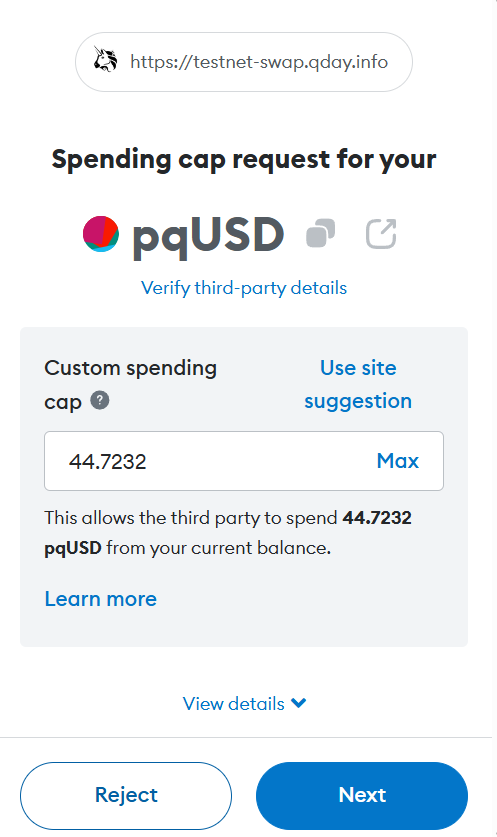
- In the pop-up MetaMask page, confirm the “Custom spending cap” amount of pqUSD (the default may exceed the balance, adjust the value accordingly), and click the “Confirm” button to confirm.
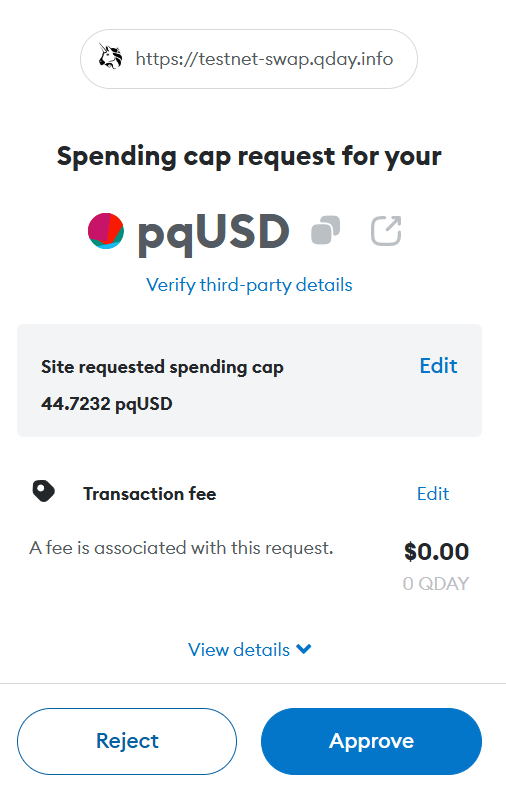
- Continue to click the “Approve” button to confirm, and after a while, complete the liquidity addition. Refer to step 6 to check the transaction status and details.
Note: Test tokens are for testnet purposes only and have no real value.
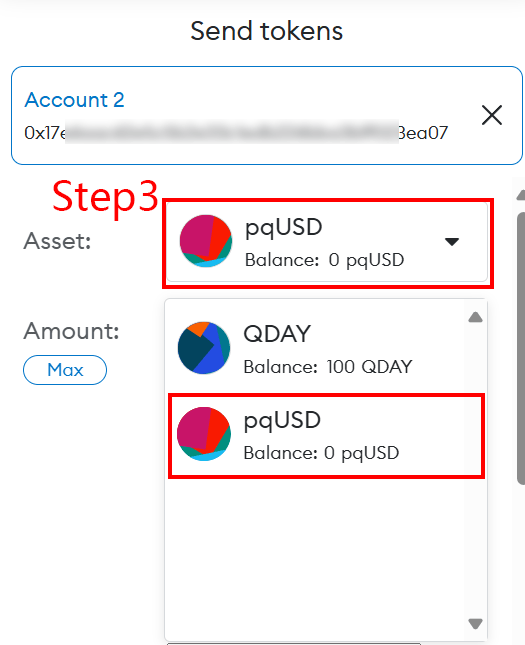
MetaMask Transfer ERC20 Token (pqUSD)
- Refer to the steps: MetaMask Transfer QDAY
- In step 3, change the “Asset:” option to the ERC20 token (pqUSD).
Thank you for reading the QDay Testnet User Guide! We hope this document helps you better understand and use the QDay Testnet. As blockchain technology continues to evolve, QDay is committed to providing users with a quantum-safe, efficient, and sustainable decentralized trading experience.
Please stay tuned to our official website and community for the latest updates and support. If you have any questions or feedback, feel free to contact us!