WARNING
The redesigned version of the QDay testnet is about to launch, and this tutorial and related links are now outdated! Stay tuned for the arrival of the new tutorial!
QDay Testnet Test Tokens
You can obtain QDAY test tokens through the QDay Testnet faucet or by applying in the Discord community.
Obtaining QDAY Test Tokens (Faucet)
- Visit the QDay Testnet Faucet page;
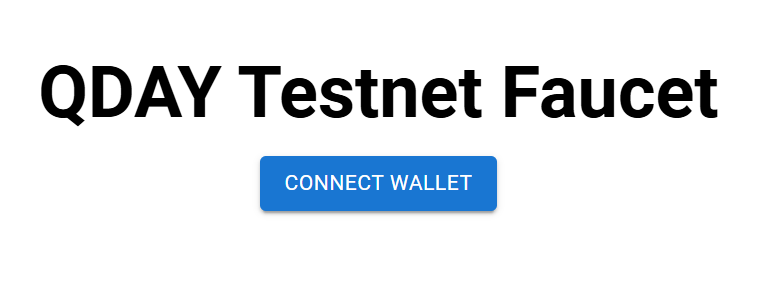
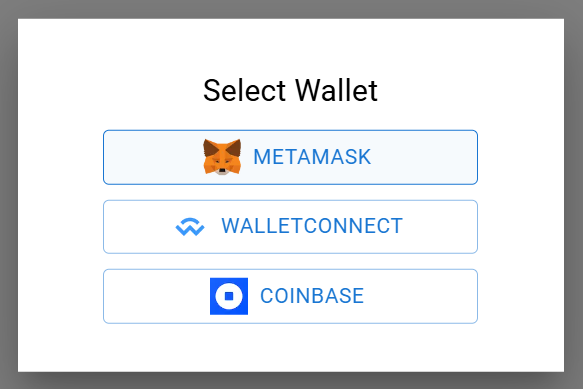
- Click the “CONNECT WALLET” button, and in the pop-up window, click the “MetaMask” button;
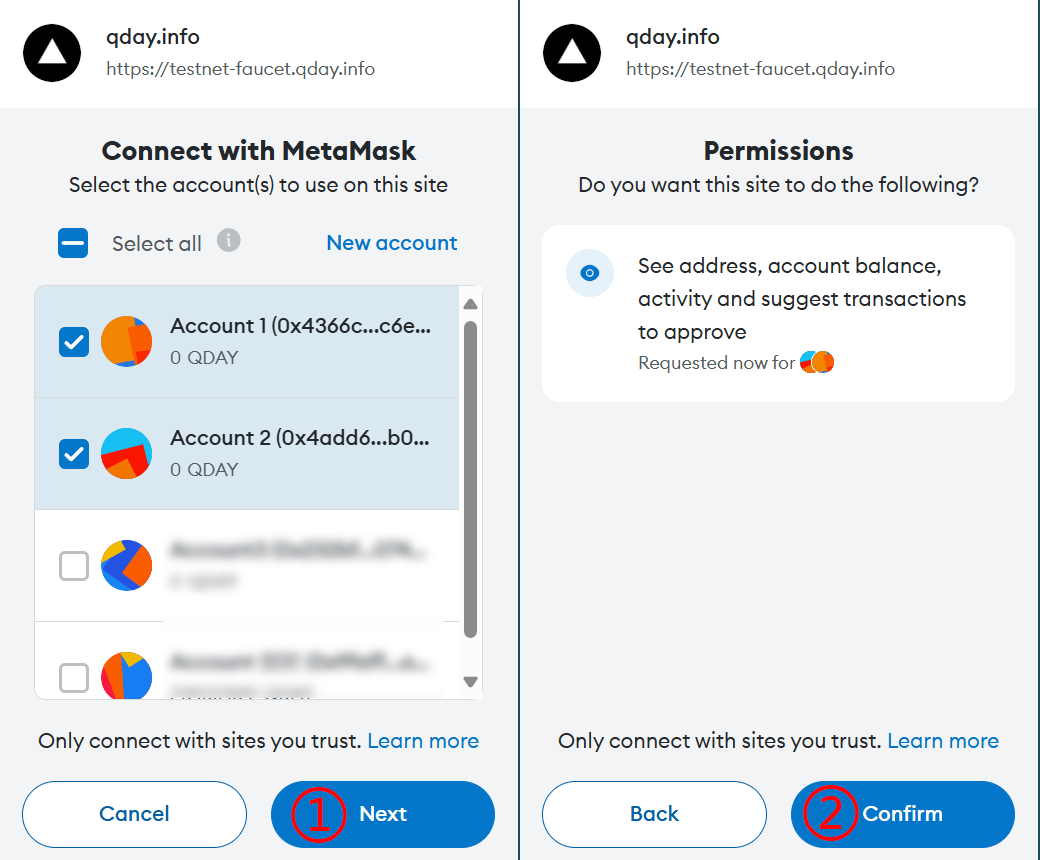
- In the MetaMask extension panel that pops up, select the wallet accounts “Account1” and “Account2” you want to connect, click the “Next” button to proceed to the authorization page, then click the “Confirm” button to confirm;
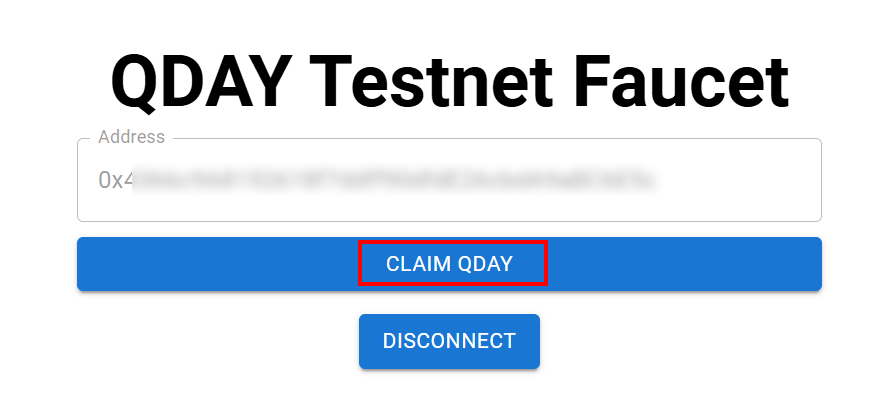
- Click the “CLAIM QDAY” button to receive 100 QDAY test token (the example uses the Account1 address to receive);
- MetaMask will pop up a signature window, click the “Sign” button to sign;
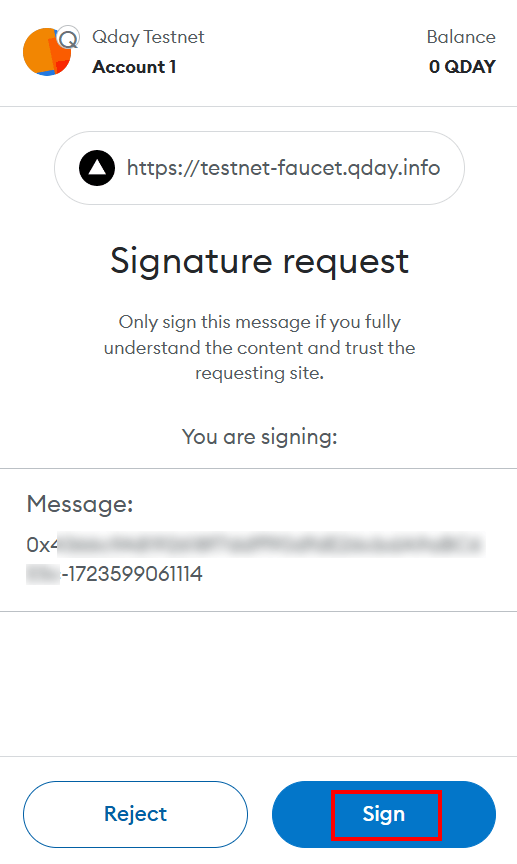
- After a successful signature, the Account1 account in MetaMask will receive 100 QDAY test tokens, you can claim up to 10 times, totaling 1000 QDAY test tokens.
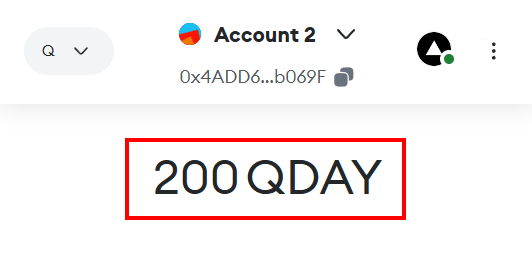 (This balance is the result of receiving it twice.)
Community Application for QDAY Test Tokens
Please join the official pqAbelian Discord Channel and submit a ticket to apply for QDAY tokens.
- In the left sidebar menu, find “||SUPPORT||” at the bottom, click the + sign next to it, expand the submenu, and click “Support-Ticket” to create a ticket.
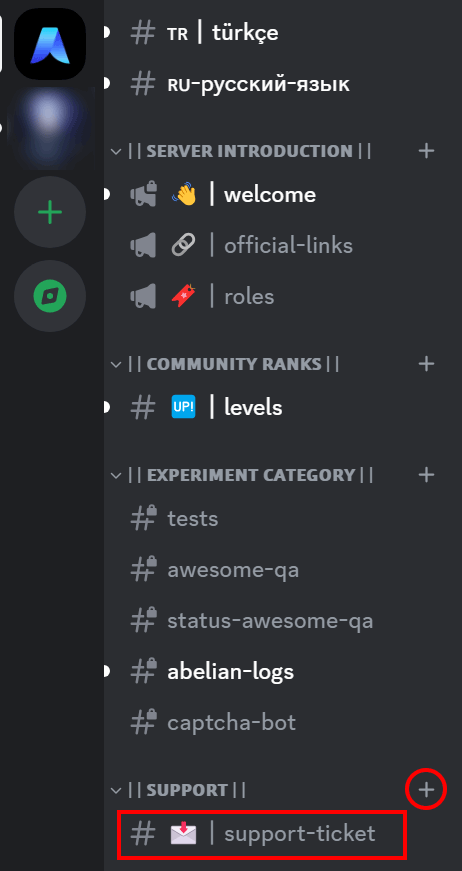
- The first line should be:
QDAY Testnet Faucet; - In the following content, describe the purpose of your QDAY test token application. The more detailed your description, the easier it will be to get approved, especially for large amounts of test tokens;
- Finally, leave your MetaMask wallet address for the QDay Testnet (to receive QDAY test tokens).
Based on the previous example of creating a MetaMask wallet account, the default address for applying for QDAY is the “Account1” address. After receiving QDAY test tokens, it will look like this: 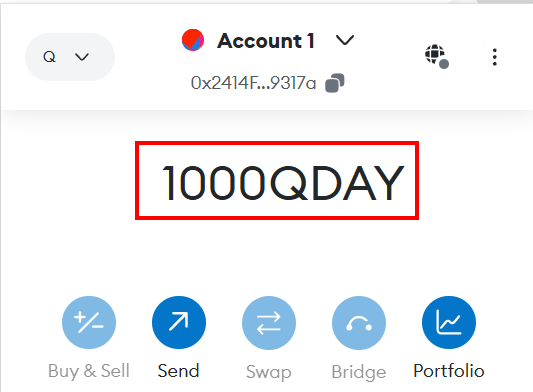
Transferring QDAY with MetaMask
This example will help you use the MetaMask wallet to transfer QDAY tokens on the QDAY Testnet network. Please follow the steps below:
Prerequisites
Before starting, please ensure you have completed the following:
- Installed MetaMask and created an account.
- Added QDAY Testnet to MetaMask.
- Obtained some QDAY test tokens.
If you have not completed the above steps, please refer to the QDay Testnet User Guide for the MetaMask wallet sections.
1. Open MetaMask
- Click the MetaMask icon in the upper-right corner of your browser to open the MetaMask extension.
- Ensure you have switched to the QDAY Testnet network.
2. Initiate a Transfer
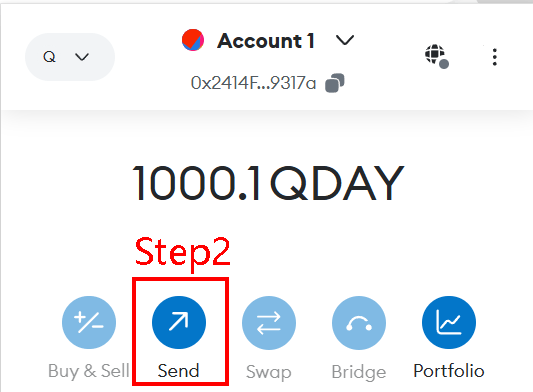
- Ensure the account at the top center of the MetaMask page is “Account1”, then click the “Send” button;
3. Fill in Transfer Information
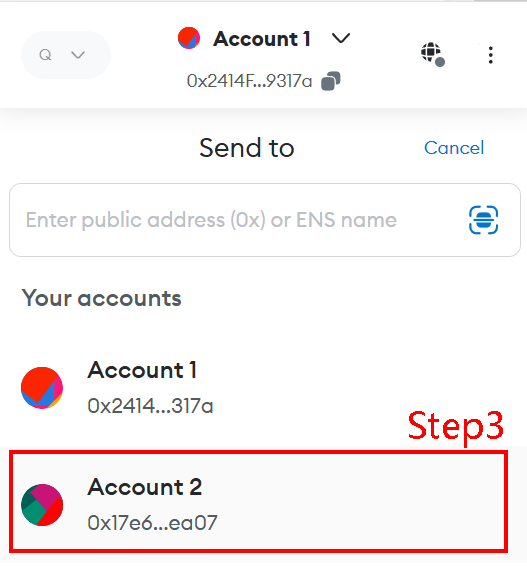
- Enter the Recipient Address: In the “Send to” field, enter the QDAY address you want to transfer to (here, directly select “Account2” under “Your accounts”);
- Enter the Transfer Amount: In the “Amount:” field, enter the amount of QDAY you wish to transfer.
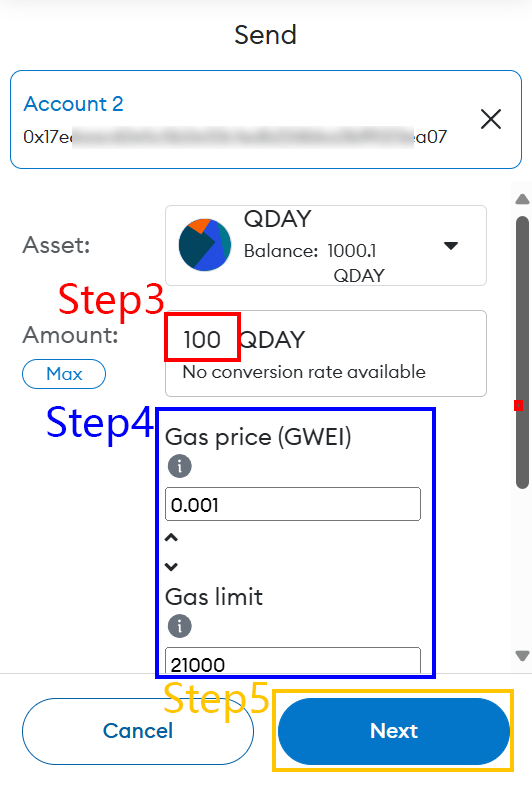 (Example amount: 100)
4. Adjust Gas Fee (Optional)
- You can adjust the “Gas price (GWEI)” and “Gas limit” fees below. The default settings are usually appropriate (no changes needed).
5. Confirm Transfer Information
- Check that all transfer information is correct, including the recipient address and transfer amount.
- Once confirmed, click the “Next” button.
6: Submit Transfer
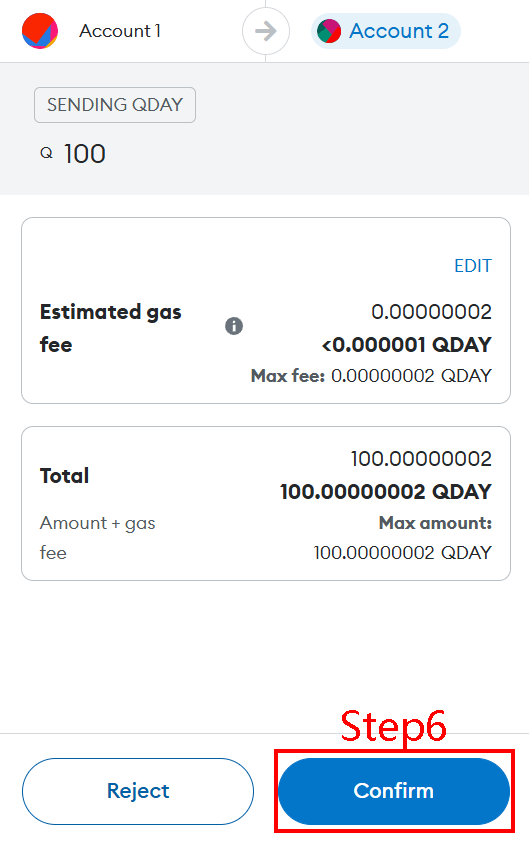
- In the confirmation window that pops up, check the transaction details.
- If everything is correct, click the “Confirm” button to submit the transfer.
7: View Transaction Status
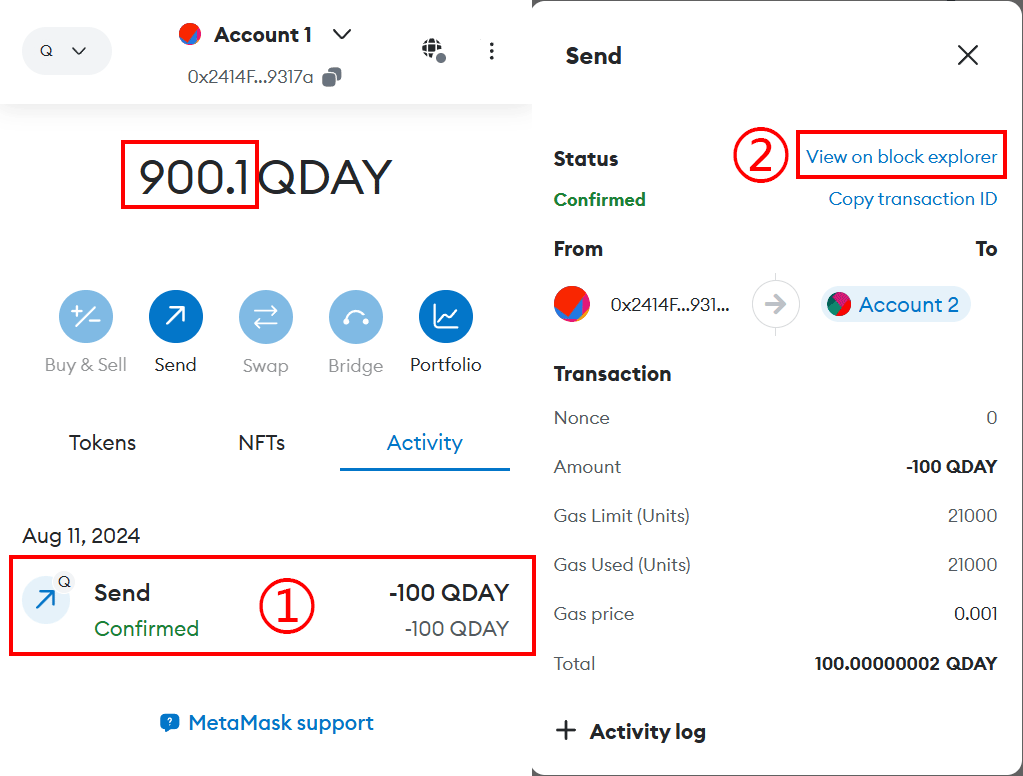
- After submitting the transfer, you can view the transaction status in the “Activity” tab of MetaMask.
- Click on the transaction to go to the transaction details page, and click “View on block explorer” to view detailed information on the QDAY Testnet blockchain explorer.
Notes
- Be sure to confirm the recipient address is correct to avoid asset loss.
- Ensure your account has sufficient QDAY balance to cover the transfer amount and Gas Fee.
- Verify the network status before transferring, and avoid large transfers during network congestion.